Showing posts with label Technique. Show all posts

Friday, December 27, 2013

Lamb and Mushroom Winter Ragu over Pappardelli [Zack]

It's winter.  Whether you like being out in the cold or not, most people agree that comfort food is best eaten looking out of your window and being happy that you are inside and warm.

This pasta dish squarely sits in the "comfort food" section of my recipes.  Each ingredient is added with the intent of boosting the umami factor.  I suggest getting a whole lamb shoulder from the butcher and to cube the meat yourself.  You'll save tons of money and plus you'll get to throw the bone into the pot to add even more flavor!!


You'll notice that fish sauce is in the recipe.  This is the secret ingredient that adds deep and bassy flavors to Thai or Asian cooking.  A touch of it will make a huge difference, and as long as you don't overdo it, you'll never notice any fishy flavor.


Process:

Wash and slice the mushrooms, and slice the red onions into moon slivers.  Cube the shoulder meat into roughly 1 inch chunks, keeping the bone.

Place a pot with a lid or a dutch oven over medium heat.  Brown the lamb on one side only, in a little bit of canola oil in batches.  For a scientific detailing on how your meat will retain more moisture, please see Kenji's explanation.


Transfer the lamb cubes to a plate, and toss the mushrooms and onions into the pot.  Add a bit more oil if needed.  Let these cook for about 5 minutes.


Then add the lamb back in, along with the bone.


The dried mushrooms, the red wine, 1tsp fish sauce, and the tomato puree all can join the party now.  Reduce the heat to low, cover the pot, and simmer for 3-4 hours.  Remember to stir it every once in a while so you won't get burned bits sticking to the bottom of the pot.


Your ragu should darken and thicken up noticeably.  Taste, and see if it can take more fish sauce.  I normally put about 2tsp in.  Adjust the salt and sugar (if needed).  To test if the ragu is finished, pull out a piece of lamb and see if it falls apart like pulled pork.


Take the bone out, salvage any good meat on it with your fingers, and throw the meat back in like you're a professional fisherman.


I like to serve the ragu over wide noodles that the sauce will get clingy.  I topped mine with some grated pecorino.


Ingredients:
3 lb / 1.5 kg lamb shoulder
1 lb / 500g assorted mushrooms
1/2 cup dried mushrooms
2 medium red onions
2 cups red wine
3 cups tomato puree
1/2 tsp brown sugar
1-2 tsp fish sauce, to taste

pappardelli or other wide noodles
grated pecorino cheese

Song:  Mystikal - Bouncin Back
Bouncin' Back (Bumpin' Me Against the Wall) by Mystikal on Grooveshark

Thursday, December 19, 2013

How to Crack a Coconut Perfectly in Half [Zack]

A cleanly-halved coconut makes a great serving vessel.  You can pour pina coladas, fresh fruit, or even curries into them for a unique presentation.  Below are instructions on how to halve a coconut!


Process:

First, you need to drain the water out of the coconut.  To do this, you need to gouge the eyes you with a screwdriver and a hammer.  Rest the coconut on a cutting board so the eyes are facing up, and gently tap the screwdriver point through one of the eyes.  It should go through without too much fuss.  Repeat the process for the other 2 holes. 


 Now your coconut should look sufficiently worried.  Poor lil guy.  


Turn it upside down and let the water drain into a glass.


Once that’s finished, you’ll need to get crackin.  Take the back of a heavy knife (I used the back of my cleaver) and start tapping firmly along the equator of the coconut.  


Slowly turn the coconut in your hand and continue tapping.  You should see a crack form where you were striking it.


Once it’s broken in half, wash out any chipped shell that may have ended up inside, and use it how you like!  Pro tip:  if you are serving a liquid in the half that has the holes from the eyes, you can put a square of baking parchment paper on the bottom so the liquid doesn’t escape!


Ingredients:
1 coconut
1 hammer
1 screwdriver
1 heavy knife

Song:  Movits - Skjut mig i huvet
Skjut mig i huvet by Movits! on Grooveshark

Monday, September 16, 2013

Spinach Fettuccine w/ Seared Scallops [Matt]

I've never attempted to measure my ingredients for making pasta. Half the fun comes from getting your hands into the dough and adding pinches of things as you go along. Here's my best attempt at the process of making fettuccine (supplement with YouTube videos if you're more of a visual learner).

Fettuccine Ingredients:
4 Whole Eggs
3 Additional Egg Yolks
3 Cups Unbleached All-Purpose Flour
1 Tablespoon Olive Oil
1/3 Cup Half-&-Half
1 Teaspoon Sea Salt
(For Spinach variation, food process 2 cups spinach into a minced consistency and add to the bowl)

Since I have no one to impress with fancy cooking antics, I mix my dough in a large mixing bowl. This saves me from dealing with the mess of yolks ingrained into my counter top and keeps flour from going in every direction.


Dump the 3~ cups flour into the large mixing bowl. Make a divot in the center of the flour to put your eggs. Add in the 4 whole eggs and 3 additional yolks (please, do yourself a favor and splurge on the 'cage-free organic'. It REALLY does make a difference with end pasta texture). Add the olive oil, half-&-half, sea salt and spinach (if you're swinging that way).

I use a solid-state whisk to slowly start blending the eggs together. You want to gradually start pulling in flour until it clumps to the point where you wonder why I told you to use a whisk in the first place. Scrape the dough off the whisk with your fingers. Start mashing the dough together in the bowl with your hands until it doesn't really seem like any more flour is getting added to your ball. 

Remove the semi-dough ball from the bowl, flour your counter, and pretend your dough ball is a Bop-It (twist-it, turn-it, mash-it, press-it, etc?). Once your dough ball has reached the strange state of firming up, yet a bit smooth when pulled, put the ball aside under a damp dish towel. Let it rest while you set up your pasta crank.

Once your pasta crank is together, make sure you have some place to rack your pasta. I use pasta rack trees. They're dope.

Take a pinch of dough, you'll really have to eyeball it, and run through the crank in descending numerical order. Fold the dough over a few times when putting it through the initial notch 8, eventually progressing down to notch 2 (second to last as far as thickness).


I recommend dusting your counter / the bottom of the rolled pasta sheet with flour. This will help prevent the pasta sheet from sticking as it slides through the machine.

Run the sheet of dough through the fettuccine crank attachment. Take the shaped pasta and hang it on your drying rack(s). Do this until you're out of dough. 

Scallop Ingredients: 
1 lb Large Bay Scallops
Butter
Salt
Pepper 

Get a big pot of water boiling - add in a splash of olive oil and pinch of salt. This helps the pasta from sticking to itself and raises boiling point. 

Take out your favorite large searing pan. Lightly coat the bottom with melted butter as you bring the heat up to med-high. Lightly dust both sides of the scallops with salt and pepper, then plop them onto the pan. It's key not to shift their position or turn them over until the bottom of scallops have a proper light brown sear, otherwise the meat will tear. The sear will take around 2 - 3 minutes on each side pending heat. The key is to get that golden brown without over cooking the scallops. 

When you are about to turn your scallops over, add your pasta to the boiling water. The pasta, since it's fresh, should only take 2 - 4 minutes to cook (depends on thickness of pasta vs. water temp). Pull out a strand or two and be sure to try it before dumping it into the sieve. 

Time to multi-task. Flip your scallop, then start to heat up a third pan. Add in a splash of olive oil on medium heat to the fresh pan. When your pasta finishes boiling, sieve it, then shake it to get any remaining water out. Dump the pasta into the heated oil. Sauté the pasta for about a minute and a half, then plate. Your scallops will probably finish cooking before the pasta, so put them to the side to rest.

To go next-level, like the dish below, you can sauté onion, asparagus and prosciutto before adding in you pasta. This will take a bit more planning and should be started right around when you dump you pasta in to begin boiling.

Finish with some fresh grated lemon zest and parmesan reggiano.


Best of luck and feel free to experiment once you get the hang of it!


Thursday, May 30, 2013

Beef Stock + French Onion Soup [Zack]

If chicken stock is like Eddy Murphy (versatile, well-liked by everyone, and the most popular of stocks), then beef stock is like Charlie Murphy.  It's not made as frequently, it's underrated, and if used in the right way, it can be better than chicken stock.

It takes a bit of time to make the beef stock, but overall it requires very little active cooking time.  I suggest that people try to make stock one time to see if they're willing to go through the effort to make it from scratch.  And while you are at it, you may as well make a really big batch and freeze the extra for other uses!

Head over to your local butcher and ask which bones are the best for beef stock.  They'll tell you that you want thick, marrow-y beef bones with some meat left on them.  The bones will be dirt cheap (unless too many people read this post ;))

One of the ultimate uses for beef stock is a classic French Onion Soup.  Using homemade stock will put your soup miles ahead of one using canned broth.  Because you're using such a nice beef stock, you can simplify the recipe and it will still knock socks off.


Process for Beef Stock (French Onion Soup Recipe after the Ingredients Section):

Slice 2 onions in 1/2 (you can leave the skins on as long as they aren't dirty), slice a carrot, and grab a few cloves of garlic.  Toss them on a tray with your beef bones and put them into a 400F / 200C oven for 20-30 minutes until they are caramelized.  This will deepen the flavor of the stock.


Add the roasted bones, the bay leaf, and veggies to a stock pot.  I like to pour some water onto my cooking tray and scrape up all of the good bits of beef flavor stuck to the tray.  Pour this into your stock pot.


Fill the pot with water until it covers the bones, bring the whole thing to a fast boil, and skim off any foam or impurities that float to the top with a spoon.


Put the stock pot into an oven at 225F / 110C.  Walk away for about 8 hours.  Alternatively, you can make it in your pressure cooker to drastically reduce the cooking time to about 2 hours.  (use the same method as the pressure-cooker chicken stock, but extend the time)

After your bones have given up all of their flavor, grab them out of your pot with tongs and throw them away.  Strain the stock through a fine-mesh strainer (I never use cheesecloth, but you certainly can if you want).

You can continue to reduce the newly-strained stock if you want to have the flavor more concentrated.  You can store it in multiple ways:  reduced heavily and frozen in ice cube trays for sauces, in jars in your freezer (easier for soups), or in large gallon freezer bags so they lay flat in the freezer.  As long as you don't burn the liquid by reducing it too much, you can always add water to dilute it for a soup.

If you reduce it a lot, it will be super gelatinous like the below chicken stock.  This stuff will add a ton of body and flavor to your sauces.


Ingredients:
3.5 lbs or 1.5 kg beef bones (with some meat on them) - this cost me $8.
2 onions
1 carrot
3 cloves garlic
1 bay leaf
a few black pepper corns


Anyways, on to the French Onion Soup Recipe -


Process for a simple French Onion Soup:

I read through a lot of recipes online - most list over 15 ingredients for a classic French Onion Soup.  If you make your beef stock from scratch, the only thing I think you need is a small kick of cognac and port to give a twang to the sweet and meaty flavor of the soup.

Properly caramelizing onions takes about 45 minutes.  Yes, I know this seems like a long time, but it's worth every minute. Put your butter and olive oil into a stock pot over medium-low heat.


Slice your 6 large yellow onions into moons and add them to the stock pot.  Cook them lightly and slowly until they are dark and brown (but not burnt).  If they start browning before they have softened, you can add a few T of water and scrape up the brown bits on the bottom.  Keep adding splashes of water until you achieve your desired color.


Next, add in your beef stock and warm it through.  Add a splash of cognac and port to your soup and taste.  The alcohol will chill out after about 5 minutes, but take it easy in the beginning.


While the pot is warming up, slice your crusty bread and toast it until it's light brown.

Pour the hot soup into a bowl or ramekin and top with the crusty bread.


And then cover it with a nice melty cheese.


Toss it under the broiler until the cheese is melted!


Ingredients (makes a lot of soup!):
2T of butter
1T olive oil
5 cups beef stock
6 large yellow onions (other kinds are okay too)
2-3 T cognac (to taste)
2-3 T port (to taste)
crusty slices of bread
Emmental or other melty cheese

Song:  Major Lazer - Bubble Butt
Bubble Butt by Major Lazer feat. Bruno Mars, Tyga & Mystic on Grooveshark

Tuesday, January 1, 2013

Caramelized Pressure Cooker Carrot and Parsnip Soup [Zack]

I'm not sure - this new pressure cooker soup may flat-out tie the pressure cooker chicken stock recipe in terms of life-changers. While originally shopping for a pressure cooker (with Gita), I thought I was only going to be making Indian food in it. A lot of the recipes involved toasting spices, pressure cooking veggies for a certain number of pressure "hisses", and then enjoying a hot and spicy meal.

But once I got comfortable using the pressure cooker, I started reading about how the cooker could speed up the cooking times of a multitude of different recipes. The next logical step (to me) was to start experimenting with making teriyaki beef short ribs. They turned out great, and the cooking device mimicked a multiple-hour braise in the oven in about 45 minutes. Next, I graduated to chicken stock (which takes 45 minutes instead of 3.5 hours to make).

Modernist Cuisine (a bad-ace cookbook that combines science and cooking and beautiful cross-section photography) wrote a recipe for making caramelized carrot soup in a pressure cooker.  I tried a dumbed-down version of their recipe and it was different than any other soup I've ever made before.  The texture was impossibly smooth and it had a nice deep flavor.

If you have a pressure cooker, give this a shot.  You have nothing to lose!


Process:

Start by organizing your ingredients and peeling the carrots and parsnips.


Next, slice the carrots and parsnips into 1/4 inch chunks.  Also peel and halve your shallots and garlic.


Melt the butter and add it to the pressure cooker over medium heat.  Once the butter is melted, add the peeled and halved shallots.


Saute for a brief few minutes to develop some color.  Next, add in the rest of the ingredients and stir to coat with the butter.  Dump in your 1/2 tsp of baking soda and your 1/2 cup of liquid.


Close the lid of the pressure cooker according to your manufacturer's directions and let it cook for 15 minutes once you hear your first "hiss".

Once the 15 minutes are up, depressurize the pressure cooker under cold tap water.


Remove the lid and you should see nice, soft veggies.  You can also see some caramelization on the bottom of the pot.


Add in your 2 cups of chicken stock (or water), and blend with a stick blender.  Make sure to scrape up all of the flavor goodies at the bottom of the pot.


The soup should be silky and flavorful.  Adjust for salt and seasonings and serve!  I used my Gitadini Stacko Serving Stand to present it, along with 2 other soups :)


Ingredients:
3 large parsnips
3 large carrots
3 shallots
3 garlic cloves
3 T butter (1/3 of a stick)
1/2 tsp baking soda
1/2 cup water
2 cups chicken stock (or water for all-veg)

Creativity options:

  • Add ginger
  • Use any root vegetables (pumpkin rocks)
  • Add cloves, cinnamon, etc
  • Add cumin
  • Stir in something naughty to finish off the soup:  heavy cream, coconut cream, sour cream

Song to make smooth soup love to:  Alicia Keys and Maxwell:  The Fire We Make
Fire We Make (Ft. Maxwell) by Alicia Keys on Grooveshark

Saturday, May 12, 2012

Homemade Beef Jerky [Zack]

Sometimes people are adventurous with their food.  Rarely is your food more adventurous than you are.  I'm proud (and/or jealous) to say that my first batch of homemade beef jerky has traveled to the top of the world.  Here it is at the summit of Aconcagua, Argentina - the highest peak in the Southern and Western Hemisphere at 6,962m.


Our good friends John and Martina decided to ditch out on corporate life and take a 7 month hiatus to backpack around the world, climbing the tallest mountains on many different continents.  Even though we were sick with envy, Lauren and I wanted to get them a proper going away present.  But what do you get people who just sold all of their life-long possessions at a flea market for 1 EUR a piece??

Beef jerky was our answer.  It's great for hikers - the weight to protein ratio is amazing and it gives a much-needed boost of salt.  It would also remind them of us because it's very American - imagine a cowboy sitting under a tree in the shade, hat tipped low, gnawing on a piece of beef jerky.  Cowboys had it figured out - if they let strips of beef dry in the sun, they would became much lighter to carry and wouldn't spoil.

I was surprised at how great homemade beef jerky tasted and how simple it was to make.  In summary, you pour all of the ingredients into a bag, let the meat marinate for 1 day, then put it in a low-heat oven to dry it out until it feels like beef jerky.

It's preferable to use a cheap cut of meat because any fat creates a chance for it to spoil.  Save the rib-eyes for the grill!


Process:

Below a picture of the necessary ingredients:


Trim any fat off of your beef.  Place it into the freezer so it firms up.  It’s a lot easier to slice the meat evenly if you put it in the freezer for about an hour.   It’s important to try to maintain the same thickness for all of the slices of beef because you want even drying.

Dice or chop your ginger, garlic, onion, and chiles.  Place them in a large zip-lock bag.  Measure out your soy sauce, vinegar, honey, sesame oil, and brown sugar.  Stir to mix and pour it into the bag.


Take your steak out of the freezer and make sure it’s firm to the touch, but not a solid brick (or else you won't be able to slice it).  Slice each piece ~1/8 inch thick and place into the marinade bag.


When you are finished, squeeze out as much air in the bag as possible and massage the marinade around the meat. Refrigerate for 1 day.


Take the meat out of the bag and drain off the marinade. Place the meat on a grated oven rack, leaving a little space around each piece.  I put a tray below it to catch the marinade that drips off during the drying process.


Put into the oven at 150 F / 75 C for 3-4 hours.  The time really depends on the thickness of your slices.  If you've ever had beef jerky before, just take it out when it feels like the stuff you get out of the package.  The low temperature will dry out the beef strips and you’ll be left with jerky in a few hours!


Bag it up for your hiker friends, or place it in a covered container.  It should last for a few weeks, but it's doubtful that it will make it through the first evening.


Ingredients:
1/2 inch ginger
3 cloves garlic
2 birdseye chiles
1/2 red onion

3/4 cup light soy sauce (or 1/2 cup regular)
2T rice wine vinegar
1/2 T sesame oil
4 T honey
2T brown sugar

2 lb steak (900g)

Creativity Options:
Add lemongrass and cilantro to the marinade for a Thai feel
Smoky paprika will give a nice deep flavor
Tons of freshly cracked pepper is a great variation

Song:  Robin Thicke - Compass or Map

Friday, April 27, 2012

Homemade Cured Bacon 4 Ways [Zack]

My friends Steve, Pete, Mike, and Adam are holding their own "Beer and Bacon" festival in Boston this weekend since they were not able to get in the official one.  Something tells me the party that they are throwing will be better/more intense/funnier....

Since I live across the ocean from them and can't attend, I'm jealous.   The only way I can combat their skype-taunting session is to throw something equally fun back in their faces.  One thing that could possibly make them jealous is to cure my own bacon (4 different ways) and drink some Belgian beers.

I first got the idea to start curing my own bacon when I purchased Michael Ruhlman's book Charcuterie.  I've always been interested in how food was produced before big companies took over and started processing food.  Bacon is one of the most simple cures to try, and it happens to be one of my favorite foods, so it was a no-brainer.  I have made many iterations of cures and have found experimenting with different seasonings methods to be really rewarding.

Knowledge bomb:  The curing process goes back until ancient times as a way to preserve meat (way before fridges existed).  When you salt a piece of meat, the salt pulls the water out of the meat through a process called osmosis.  After curing your bacon, you will notice there is a lot of liquid in the bag.  Thanks, salt!  I have no idea how this works scientifically, but the end result is to flavor the meat, slow the oxidation process, and make it a tough place for bacteria to grow.  Boom.

There has been a bacon craze on the internet for the past 3-5 years.  This heavenly meat certainly deserves all of the accolades it has been receiving.   I know this post is late to the party, so I figured I could add a bit of flair by doing 4 different renditions of dry cures.

Taste test results are at the end of the post.


Process:

How to cure bacon:

Curing is similar baking - you have to have the right proportions of salt and seasoning to meat, or else you will end up with a bad end product.  The process is the same for all of the below cures - you just need to cure it, smoke it, slice it, and then cook it!

Get a nice pork belly from your local butcher shop.  Mine was 5 pounds, and skin-on is okay.  If you would like to try the 4 different types of cures, section your pork belly into the appropriate weights.  If not, just choose your favorite and leave the belly whole.

Weigh out and measure your ingredients.  The most important thing to get right is the proportion of salt (pink and kosher) to the weight of the pork belly.  I have also provided measurements in the recipe in case you don't have a scale.


Place each of the different pork bellies into an individual zip-lock bag, pour the dry cure in, and mix it around so the cure contacts all sides of the meat.  Squeeze out all of the air from the bag and seal it.  Place the bags into baking dish in case the liquid drips in your fridge (that's a gross mess to clean up).  You'll want to flip the bellies every day or two in order to make sure the meat is curing evenly.


Curing time depends on the thickness of the belly.  For me, it took 1 week.


To test to see whether it's finished, press on the belly and it should feel firm like a well-done steak.


How to smoke/grill cured pork belly:

Take the bellies out of the bags, wipe off the cure, and place them onto a pre-heated grill to 250F.  You'll want to use indirect heat to slowly smoke the bacon.  Turn on one burner at one end of the grill, and place your bellies on the other side.  Or if you have charcoal or wood chips, pile them all on one side of the grill.


After an hour or 2, take the bacon off of the grill and remove the skin if it's still attached.

Congratulations!  You have just made bacon!  I bet it tastes way better than the store-bought stuff.  You can either freeze it whole, refrigerate it, or get to cooking it right away.  I'm guessing it won't last very long in your house - even if you live alone....


How to properly cook bacon in a frying pan:

Slice the bacon in even thickness.  Since you worked hard to make this, you can slice it as thick as you want!  You'll need a sharp knife.  If it's still difficult, you can put the bacon in the freezer for about 45 minutes to make it more firm.  

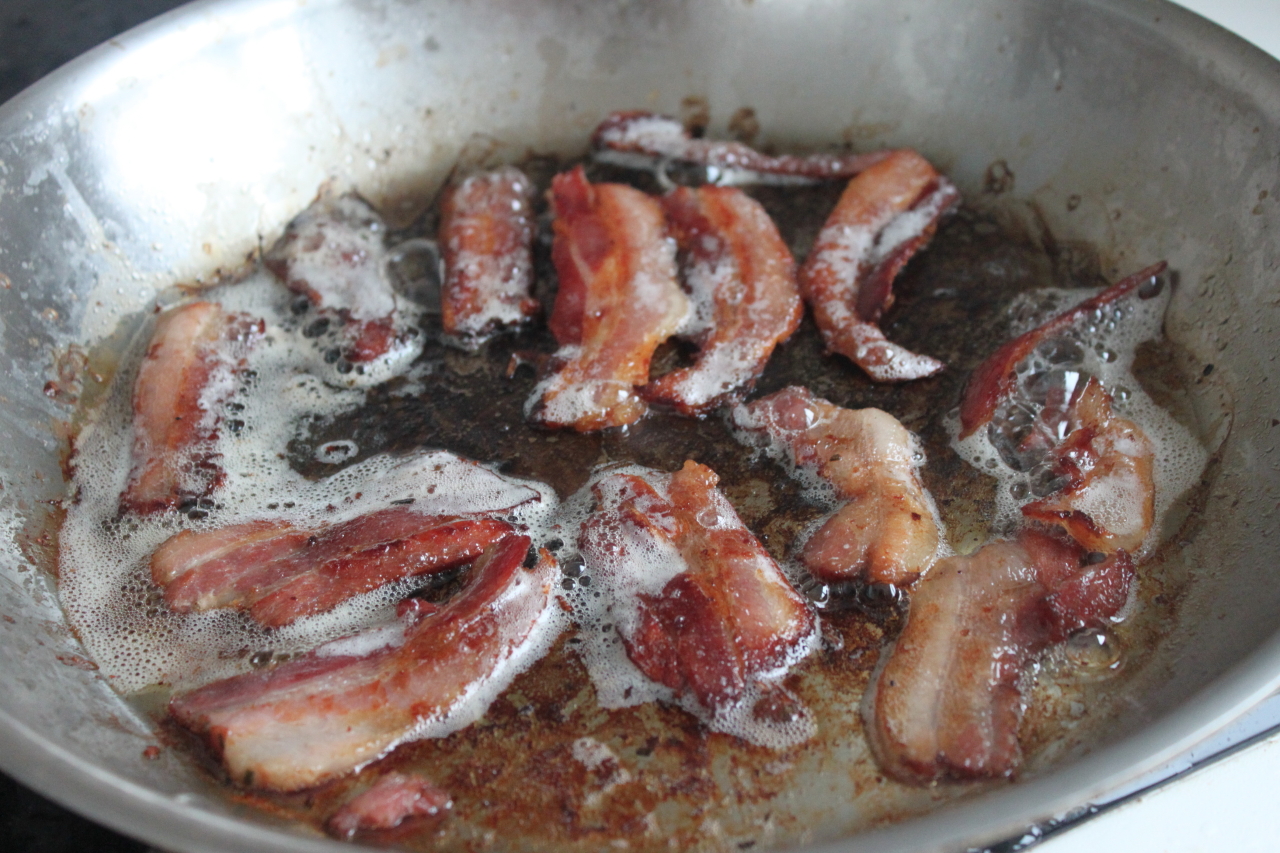
The best way to cook bacon is to start the slices in a cold pan on low heat.  If you try to cook it too quickly, you'll end up burning the outside.  The cold pan allows the fat to render out of the bacon.  Once enough fat has accumulated, it will fry the bacon and produce crispy results.  Don't rush it - good things are worth the wait.


Ingredient List for the 4 cures I made:
(All proportions remain constant - if you want to cure a larger piece of belly, do a little math)

Cure #1: The Traditional - Brown Sugar Cure
A no-frills delicious bacon that is very versatile
2.5 lbs pork belly (900g)
1/8 cup kosher salt (25g)
1 tsp pink salt (6g)
1/4 cup brown sugar (50g)

Pre-cure


Post-cure and after smoking


End result


Cure #2: The Asian Sensation - Ginger, Garlic and 5-Spice Cure
A unique blend of Asian flavors that would pair well with duck or Asian-style chicken 
2/3 lb pork belly (300g)
2 tsp kosher salt (8g)
1/2 tsp pink salt (2g)
2T brown sugar (20g)
1/2 inch diced ginger
2 cloves minced garlic
1/2 tsp 5 spice

Pre-cure


Post-cure and after smoking


End result


Cure #3: The Smoky BBQ Burger Sidekick - Smoked Paprika and Garlic Cure
Perfect if you don't have a smoker - a flavorful addition to a burger or with eggs in the morning
2/3 lb pork belly (300g)
2 tsp kosher salt (8g)
1/2 tsp pink salt (2g)
2T brown sugar (20g)
1T onion powder
1 tsp smoked paprika
2 cloves minced garlic

Pre-cure

Post-cure and after smoking


End result


Cure #4: The Ole School "Pancetta" - Juniper Berry, Rosemary, and Garlic Cure
A savory cure similar to pancetta - great for pastas like carbonara
2/3 lb pork belly (300g)
2 tsp kosher salt (8g)
1/2 tsp pink salt (2g)
1.5 tsp white sugar (6g)
1 sprig rosemary, chopped
2 cloves minced garlic
8 juniper berries, cracked open to release oils

Pre-cure


Post-cure and after smoking


End result


The Verdict:

Sven - Asian, BBQ, Juniper, Traditional
Lauren - Asian, Juniper, BBQ, Traditional
Zack - Asian, BBQ, Juniper, Traditional

Song:  Addicted to Bacon - A Sizzlin Rap Song

p.s. I think I love bacon as much as this kid