Sunday, March 3, 2013

Cinnamon Braided Monkey Bread [Zack]

We had guests staying with us this past weekend (the mountain climbers/beef jerky friends). While they were still asleep, I got the crazy idea to try to bake a monkey bread. I had seen the name pop up multiple times in the last few weeks and I guess it was stuck in my head.

I googled how to make Monkey Bread, but I didn’t have the requisite bundt pan. I therefore deviated from the normal recipe of tearing dough into balls, coating them in sugar, and packing them into the bundt pan. I’ve always wanted to learn how to make a braided bread, so this was my first attempt.

Our guests were beckoned awake by the yeasty, cinnamon-y, and sugary smells coming from our oven. I was very proud of my bread creation because I had minimal help from Lauren (I am still a novice at baking).  Funny enough, Martina exclaimed, “Oh, this bread looks just like the bread they have all over my hometown Prauge!” So, instead of impressing our guests with something new, I guess I was able to remind her of  home!

It reminds me of a Mitch Hedberg Joke:
"I wish they made a cinnamon roll incense because I don't always have time to make a pan. Perhaps I'd rather light a stick and then have my roommates wake up with false hopes. "

Process:

The first step is to get your yeast going.  Put 1 cup of warm water (warm to the touch) into a glass with the brown sugar and honey.  Give it a mix and leave it alone for 10 mins.  It should look like this:


While your yeast is activating, mix together your AP flour and 1.5 tsp salt in a large bowl.  Add your yeast mixture plus the rest of the water, and the olive oil into the bowl.


Knead the dough until it is smooth and doesn't stick to your hand.  If it is too sticky, add more flour, if it's too try, wet your hands slightly and keep mixing.


Once it's a smooth ball, wash out your big bowl, dry it, and coat it lightly with olive oil.  Put the dough back in, spin it around in the oil, cover it with a dish towel, and let it rise until doubled.  It should take about an hour.


When it has risen, it should look like this:


Punch the dough back down, form it into a ball again, and quarter it.


Roll each quarter into a ball, then roll out long snakes with your hands until they are 1 inch wide.


Your 4 snakes should be roughly the same length.


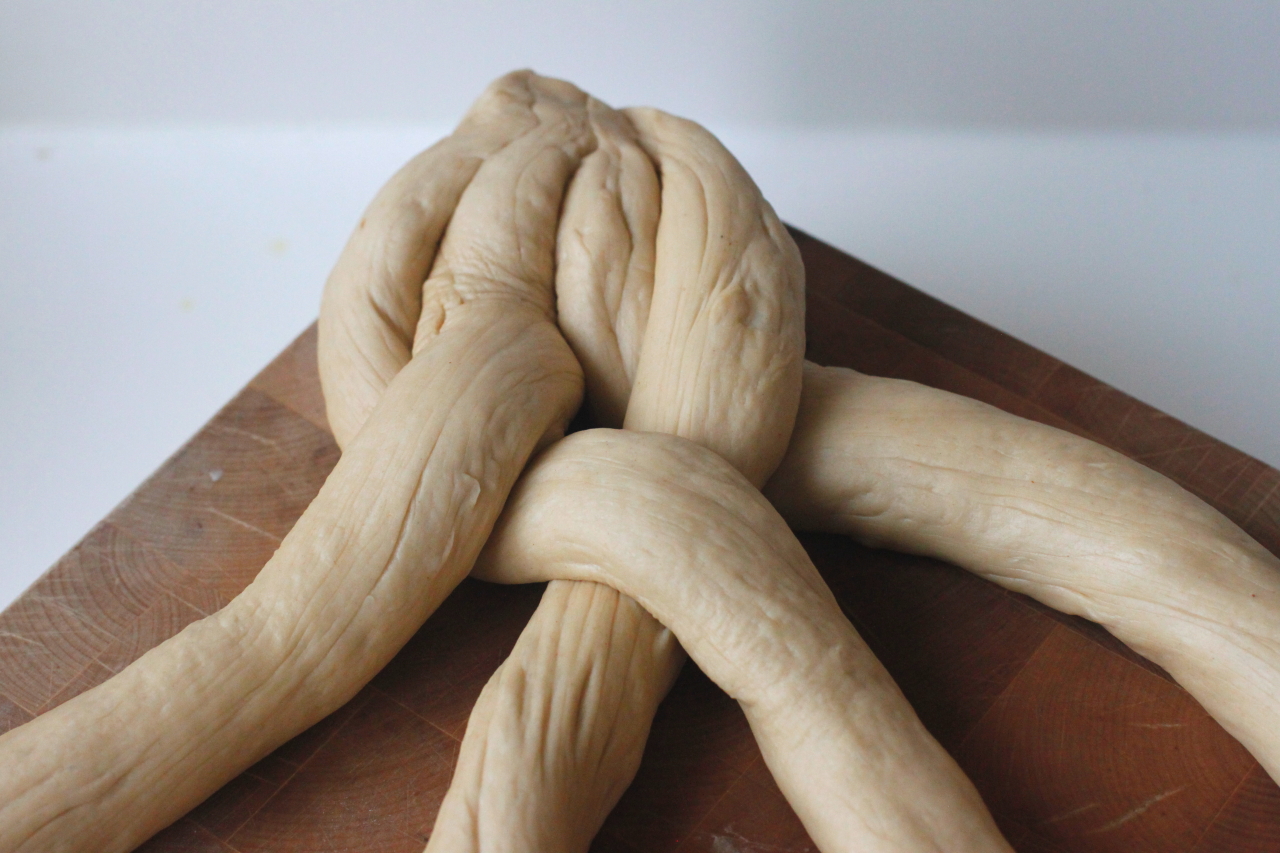
Now comes the girly part:  you need to learn to braid the strands together.  I can handle braiding 3 strings, but the 4th threw me for a loop.  Luckily Google had my back.  I'll explain it simply.  Lay the strands next to each other and pinch the far-away ends of each of the strands together.  Start by crossing the outside 2 pairs over each other.  Cross the right strands over the left ones:


Then, cross the two middle strands over each other, but this time, do left over right.


Tighten up the strands, but don't pull so hard that you over-stretch them.  Repeat the process: cross the two outer strands, right over left.  Then the middle two, left over right.  Keep going until you run out of runway.


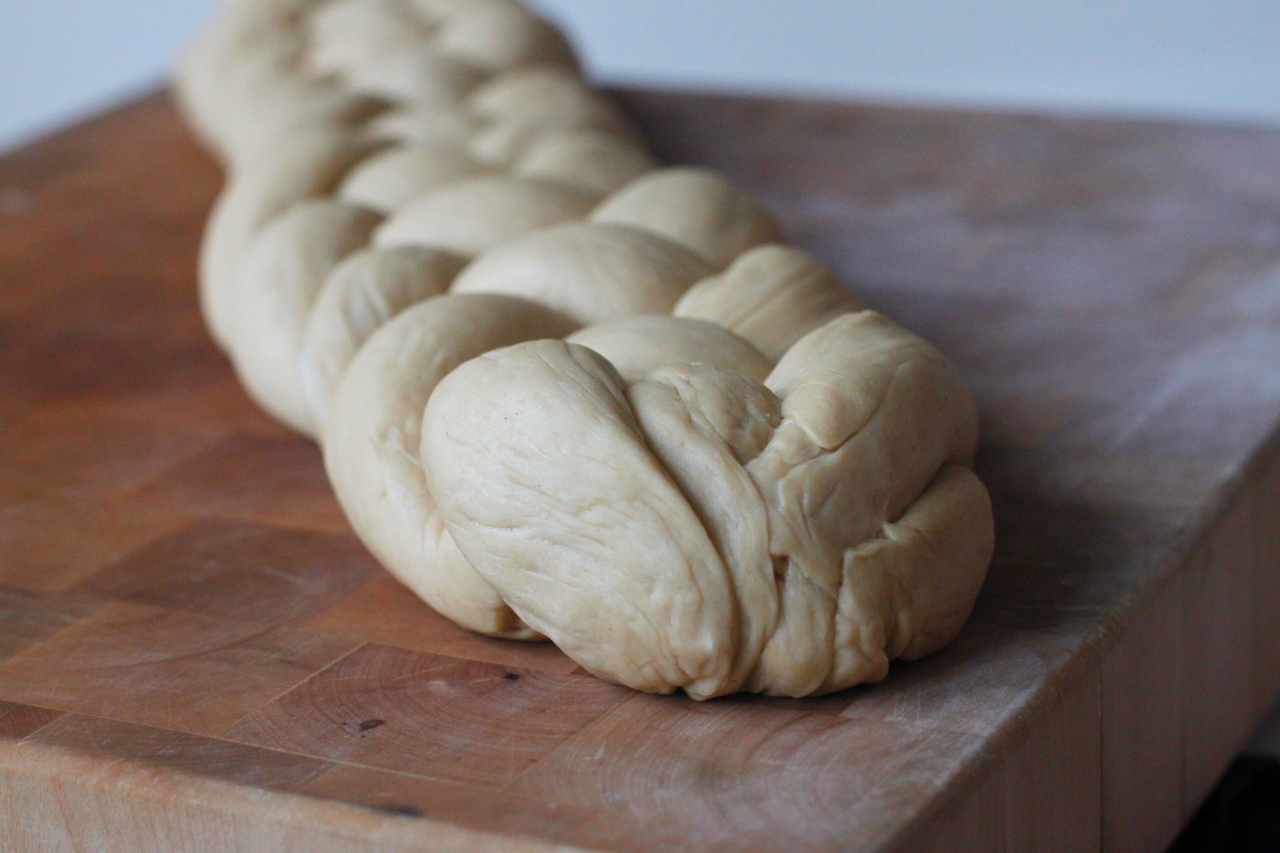
It's really not that difficult folks.  Mine somehow came out presentable.

When you get to the end, cut the strands so they are even, pinch the ends together, and tuck the end slightly  under.


Now comes the fun part.  Melt 1T of butter in a sauce pan.  Put a sheet of aluminum foil on a baking tray and paint the foil with the melted butter where the bread will rest.  Carefully transfer the bread to the baking tray.


Generously paint the bread with the butter so you can get your brown sugar and cinnamon topping to stick.


Don't be scared, really paint that sucker.  Mix the brown sugar and cinnamon in a bowl and sprinkle it on top of the bread.  Don't be dainty!


Let the bread rest and rise for 30 minutes while you heat up your oven to 350F / 175C.  Pop it in the oven and bake until it's golden-brown and the sugar has caramelized on top.  It will take about 20-25 minutes.


Let the bread rest for 10 minutes, then slice it with a serrated bread knife so you don't lose the shape.


Serve warm with a pad of butter and dip it in your morning coffee like Mike Koulermos.

Ingredients:
2 packets of yeast
1/2 cup brown sugar
2 cups warm water
5 to 6 cups AP flour (or 00 flour is even better)
1/4 cup olive oil
1.5 tsp salt

topping:
1 tsp cinnamon
2T brown sugar
1T butter (melted)

Since baking is more of a Lauren activity, here is a Euro Laurie jam:  Disclosure - Latch
Latch by Disclosure feat. Sam Smith on Grooveshark

Monday, February 25, 2013

Vegetarian Pumpkin, Beet, and Mushroom Couscous Burgers [Zack]

While walking through the grocery store, I’m sometimes enticed to stroll past the vegetarian section. I like the idea of being able to cook something quick and healthy from the veg aisle, but I usually refrain from buying something because the products look so processed. It seems like a strange dichotomy: a good portion of people go vegetarian for health reasons, but end up losing some of the benefit due to all the long list of additives in processed foods.

And why would you force tofu to look like pork meat strips that you get in gyros? Or ground beef? Yuk. I’m getting off track….

Lauren had made a very good black bean and quinoa burger a few weeks ago, and I was craving a similar version. We didn’t have quinoa, but we did have bio couscous and some veggies that we could construct into a patty. This is a very healthy alternative to the meaty version. It takes about 45 minutes to make a batch because you have to let the veg cool off once you cook it, but you can double the recipe and freeze some pre-made burgers (separated by wax paper.)  Pop em in the oven on a week night, and eat up!


Process:

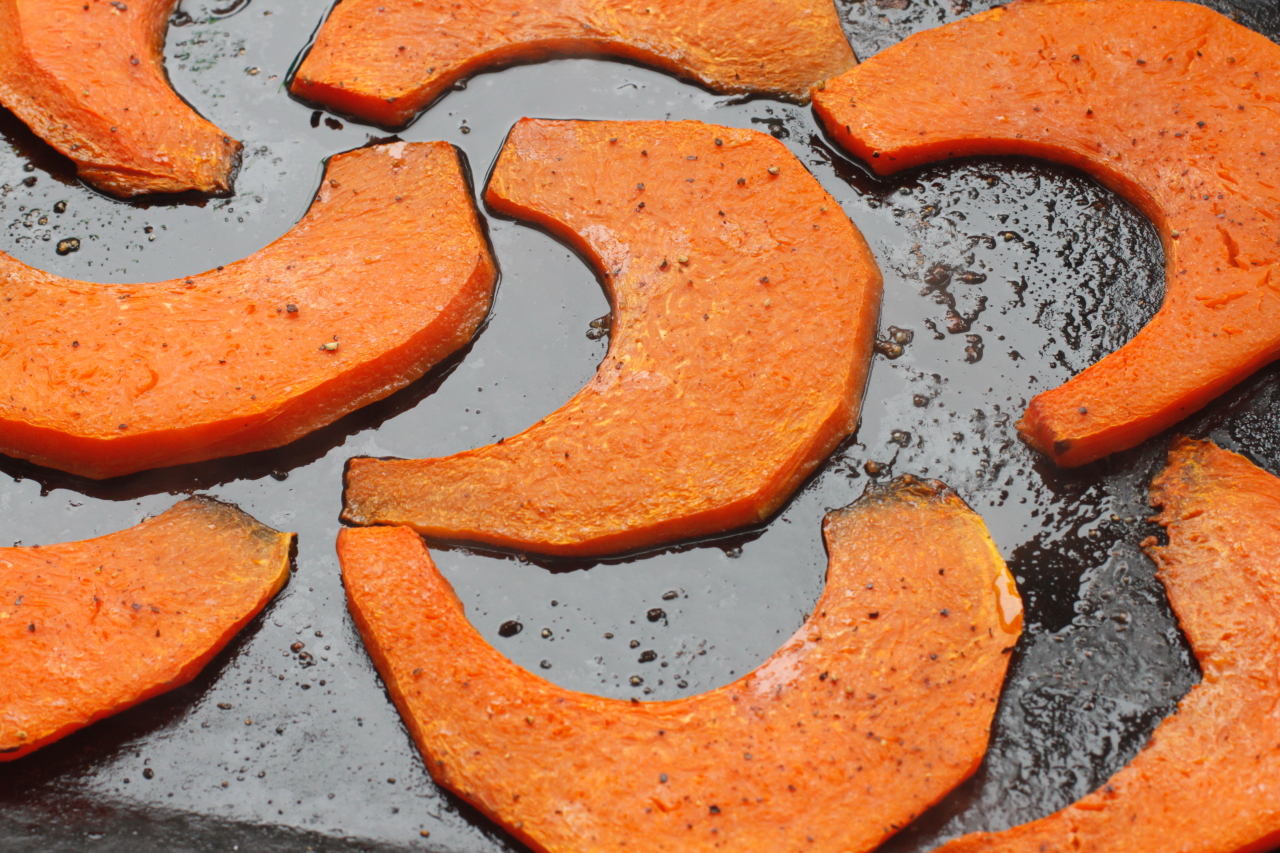
Start by slicing the pumpkin into strips and roasting it in an oven at 400F/200C. Put down a light coating of olive oil on your baking sheet, and sprinkle some salt and pepper on top. Bake until the edges slightly brown and it gets fork-tender.


While the pumpkin is going, you’ll need to cook your couscous and sauté your other veggies. Start a small pot of 1.5 cups of salted water boiling.

Heat up a pan on medium heat. Wash and slice your mushrooms, dice your red onion, and dice your beet. Add some oil to the pan, and then add in your mushrooms and onions. Stir them around until they are almost cooked - about 5 minutes, then add your diced beet and cook for another 3-4 minutes.


When the water is boiling for your couscous, pour the 1 cup of measured pasta into the pot and remove it from the heat. Yes, I just learned that couscous is pasta made from grain.  Thanks Google!


Empty out your sautéed vegetables into a nice big bowl and let them cool off. If you try to make the burger with hot ingredients, the steam will make them mushy and it won't stick together. Less water = good.

Your couscous should be finished by now, so fluff it with a fork and add it into the bowl.


Take the roasted pumpkin out of the oven, and let it cool for a few minutes. Add this to the bowl as well. Smash up the everything with a fork or a potato ricer to get rid of the large chunks. Include your breadcrumbs and flour, which will help bind everything together.

Pour in the mustard, sriracha, and oregano, give it another stir, and then you’re ready to make patties.


Quickly make up the sauce – stir together diced feta cheese, yogurt, and some diced red onion.


Form the burgers into hockey pucks the size of your burger buns, and place them in a non-stick skillet.  Cook, turning once for about 3 minutes per side.


Top your toasted buns with the crispy burgers, the creamy sauce, sliced red onion, and fresh lettuce.


Ingredients:
6 baby bella mushrooms
1 red onion
1.5 cups roasted pumpkin
2.5 cups cooked couscous (1 cup dry couscous + 1.5 cups boiling water)
1 tsp dried oregano
1T flour
1/3 to 1/2 cup breadcrumbs
1T dijon mustard
1 tsp sriracha

1/2 cup feta
1/4 cup yogurt
1T minced red onion

Techno Healthy Euro Burger Jams:  Major Lazer: Jah No Partial
Jah No Partial by Major Lazer on Grooveshark

Sunday, February 24, 2013

Mozzarella in Carrozza al la Koulermos [Mike]


I remember going with the family to Scott's Corners to Di Nardo's, an Italian restaurant, to grab one of the best pizzas in Westchester. Rhonda and I started taking Zack when he was just a baby. Soon it was the whole gang, Nick, Matt, Zack, Rhonda and me. We would order a large pepperoni pie and always shared a mozzarella in carrozza. As they got older one order soon turned to two. Talk about a grilled cheese sandwich, this was the ultimate. Great tasting homemade mozzarella that just strung out when you cut into it.


MOZZARELLA IN CARROZZA AL LA KOULERMOS

Ingredients:

8 slices of country white bread
1 pound fresh mozzarella cheese, sliced, (or better yet use fresh buffalo mozzarella)
1/2 cup of whole milk
3 large eggs
3/4 teaspoon of sea salt
1/2 teaspoon freshly ground black pepper
1/2 cup of flour
1 1/2 cups marinara sauce
Olive oil, for frying


Place slices of mozzarella on a slice of bread. You can remove the crust if you want to, I say why waste good bread. Cover with another slice of bread, making a sandwich.
Whisk the eggs in a shallow bowl, then whisk in the salt, pepper and add a dash of milk. Dip sandwich in milk/egg, then flour. Use a toothpick to hold the sandwich together while frying.

Heat about 1/2 inch of olive oil in a 12-inch skillet over medium high heat. Place the sandwiches into the skillet as the oil comes to temperature. Fry, turning once, until golden brown on both sides, about 5 or 6 minutes per batch. Drain sandwiches on paper towels.

Coat the sandwiches with the marinara. Mama Tommy's has several great red sauce recipes...much better than the bottled stuff!


Friday, February 15, 2013

Pumpkin, Sage, and Ricotta Mini Quiche Cups [Zack]

If you ever ask me whether I like to bake, I will give you some long rambling speech about hating to measure ingredients precisely. Creating posts for this website has been a challenge for me in that aspect. I like the freedom of adjusting flavors as I cook, so I always have a few messy measuring spoons nearby so I can capture what I’m doing for my posts. But for most baking, you have to decide all of your quantities up front, and then hope for the best. Bleh.

This is why I always keep puff pastry in my freezer. It’s both better AND easier than anything that I can make from scratch, and it has saved my booty many times when I wake up on a weekend morning and don’t want to trek to the grocery store.  Plus, no measuring is required :).

The only time I make a pie crust from scratch, is when I ask Lauren to make it for me…..

Here is a recipe for mini quiche cups using puff pastry. This recipe was a weekend morning invention – we had leftover roasted pumpkin, ricotta, and sage ravioli filling in our fridge, and a lot of eggs. We brainlessly mixed the pumpkin ricotta filling together with the eggs. Poured them into the puff pastry sheets that we formed inside of muffin tins, and baked it. It’s that easy.


Process:

Begin by roasting your pumpkin and draining your ricotta. Slice the pumpkin into strips, brush them with some olive oil, sprinkle some salt on top, and roast them in the oven at 400F / 200C until they are slightly browned on the edges (about 20 mins). Meanwhile, open your ricotta and drain the water out by pouring the excess off. If you want to really go crazy, you can use a cheese cloth to squeeze more water out.

Keep the oven on after you take your pumpkin out – you’ll need it to cook the quiche.

Defrost your puff pastry sheets by separating them and laying them all over your house. Butter or oil the inside of your muffin tin and form the puff pastry to form cups.


Once your pumpkin is cooked, mash it in a bowl with a fork and let it cool off. Add the ricotta to the bowl, plus some diced onions and sage. Scramble your eggs together in a separate bowl, and then pour your pumpkin mixture in with the eggs.


Give it another mix, crack some fresh black pepper, a pinch of salt, and pour it into the puff pastry.


Cook the mini quiches at 400F / 200C for 15-20 minutes, until the egg has set and the pastry has browned.


If you want, you can add some kick with a dabble of srircha on top!


Ingredients:

½ cup roasted pumpkin
1/3 cup ricotta cheese, water drained out
10 leaves fresh sage
½ onion, diced
5 eggs
10 puff pastry sheets

Creativity options for mini quiche:

  • Goat cheese, rosemary, roasted squash
  • Sriracha, roasted red pepper, feta
  • Cream cheese, smoked salmon, red onions
  • Ham, emmental cheese, caramelized onions
  • Sweet corn, jalapenos, and bacon

Funky Morning Jam:  Daniel Merriweather - She's Got Me (thanks to Lauren listening dutifully to Dutch radio for me)
She's got me by Daniel Merriweather on Grooveshark

Wednesday, January 30, 2013

Pork Balls in a Creamy Pasta Sauce [Tom]


Did you ever just want some pasta. Well it was my day off and and had a craving. It is funny when I think back, my Mom would say I have a wollie for such and such a food. I took that to mean a craving.
Sorry no way to explain. But I had a wollie for some pasta and some meat but not red sauce.

So, here we go. I had an idea and went with it. It turned out pretty good. Well at least June said it was good.

This recipe is for Four
Accompany with a salad or some garlic bread or both
So we can get on with this, Yes.

Pork Balls

1 ~ lb Ground Pork
6 ~ 8 Leaves of finely chopped Fresh Basil
2 ~ Cloves of minced Garlic
4 ~ Teaspoons grated Parmesian Cheese
~ Salt and Pepper

In a bowl mix all the ingredients well.
Roll by hand 1" to 1 1/4" balls.
1 lb will make 20 to 24 balls

Place balls in a steamer turn once or twice until balls are whiteish in color. Cook for about 6 minutes.
Set aside.


The Pasta

I used Linguini but I feel Penne would be good too.

1/2 ~ lb Pasta
5 ~ sprigs Chives cut into 1/2" lenghts

The Sauce

2 ~ tbspns Butter
3/4 ~ cup Half and Half
1/2 cup and 1/2 cup of each Parmesian and Romano cheeses mixed
1/4 cup of whipped Cream Cheese

Place a pan with water on the range to boil for the Pasta

On medium heat place Butter in a large sauce pan to melt
Add the Half and Half, Cream Cheese and Cheese mixture
Wisk the mixture until smooth.
Lower the heat and add the Pork balls and simmer for 3 to 5 minutes

Drain cooked Pasta and place into the cream mixture and toss to coat the Pasta

Plate and top with the Chives.
I tossed some torn Basil Leaves on top too

Buon Appetito

Sunday, January 27, 2013

Hoisin-Glazed Roasted Carrots [Zack]

A few of our friends decided that they were having an outdoor fish bake in January.  This idea would usually be met with skepticism (due to the snow outside), but we were on board immediately!  Hey, the grill is a heat source!

In our attempt to be good friends, we offered to bring over a vegetable side dish.  We originally wanted to make a roasted hoisin eggplant side, but the grocery store gods said "nay."  Instead, we found some fun looking mini carrots with parts of the green stem left on (for nice presentation.)

Not being one to cry over spilled hoisin sauce, we made the carrots and they paired perfectly with the fish.  The carrots were tangy, spicy, and a touch sweet and played nicely with the delicate fish.


Process:

Pre-heat your oven to 400F / 200C.  Wash and peel the carrots.  Place them in a large baking dish along with 1T of butter and 1T of sesame oil.  Roast in the oven for about 15 minutes too cook them through.


While that's going, start a small sauce pan over medium heat.  Peel and dice the ginger, garlic, and birdseye chiles.  Saute the stuff you just diced in 1tsp of sesame oil.  Once they have softened a bit, add in the oyster sauce, hoisin sauce, vinegar, and honey.  Cook for a few minutes to let the flavors combine.


Remove the carrots from the oven and give them a stir with a spatula.  Brush the carrots with the glaze, coating them evenly.


Place the baking dish back into the oven and cook for 5-10 minutes, until the glaze has caramelized.  Serve as a side and enjoy!


Ingredients:
1 lb carrots, peeled
1T butter
1T sesame oil

1 tsp sesame oil
4T oyster sauce
2T hoisin sauce
2T minced ginger
2 cloves garlic
2 birdseye chiles (or 1 if you don't like it too spicy!)
1tsp vinegar
2T honey

Funky carrot jams: Gramatik - Make You Better
Make You Better by Gramatik on Grooveshark

Tuesday, January 15, 2013

Roasted Eggplant with Olive and Red Pepper Tapenade [Zack]

Lauren and I love roasted eggplant (or aubergine for you Europeans).  The texture and flavor make it a great substitute for meat if you are trying to do the "Meatless Monday" thing.

This recipe is very simple - it takes you less than 5 minutes of active cooking time.  You'll cross-hatch and roast the eggplant for flavor, then add more flavor on top and finish it in the oven.  You can even pre-make these a few days before a dinner party and then throw them back into the oven to finish.

These roasted eggplant halves work great as a healthy side dish to accompany a wintery meal, or they can be the star of the show if you serve them with a simple salad.


Process:

First, heat up your oven to 400F / 200C.  Wash your eggplants, remove the top, and slice them in 1/2 longways.  With a sharp knife, cut into the flesh of the eggplant about 1 inch deep, keeping the skin intact.

Then, place the halves on a baking dish and rub them with a light amount of olive oil.  No real need to salt the eggplant as the olive tapenade contains salt.  Place them in the oven, cross-hatched side up and roast until they develop a nice browned surface and have softened throughout.  It should take about 15-20 minutes.


While this is going, mix together your equal amounts of olive tapenade, and roasted red pepper tapenade in a bowl.  Once the eggplant comes out, spoon the mixture over the cut side and work it into the crevices.


It is now ready to go back into the oven to develop some color on the tapenade and to heat everything through.  It should take another 5-10 minutes.

Garnish with some fresh parsley and serve!

Ingredients:
  • eggplants, halved

(per eggplant)
  • 1T green olive tapenade
  • 1T roasted red pepper tapenade
  • freshly minced parsley

Creativity options:
  • top the tapenades with breadcrumbs and a brushing of olive oil for a nice crunch
  • mix in some goat cheese
  • add 1/4 minced anchovy filet and a few minced capers into the tapenade for a depth of flavor
  • you can even substitute some pulled pork or pulled beef for the tapenades, adding cheese and a nice cumin-y thick tomato sauce.

Song to cross-hatch to:  James Blake - The Wilhelm Scream
The Wilhelm Scream by James Blake on Grooveshark

Monday, January 14, 2013

Mr. K's Smokey Bull Shot [Mike]

Cold enough for yah? Here's a drink that will warm you right down to your toes. Mike's Smokey Bull Shot is made from the classic Bloody Mary recipe, but instead of tomato juice, you use heated beef broth (Campbell's). The Bloody Mary is a cocktail that’s been around since 1921. Also known as “hair of the dog,” it’s an alcoholic beverage consumed as a hangover cure.

The Bull Shot is more of a comfort drink. After all these years the basic recipe hasn’t changed much. The main ingredients: vodka, beef broth, Worcestershire, a dark mustard, tabasco sauce, salt & pepper. A stalk of celery and a wedge of lemon top it off. I use Smirnoff Vodka, because in New York Times taste tests, it always comes up number one.

There are several ways to make a Bull Shot your own--I discovered that by using a dash of liquid smoke, which makes it extra special. If you love ice fishing, skating on a pond, a football game in Buffalo or you're in the Polar Bear Club going for a swim at Coney Island, the Bull Shot will warm your spirit.

BOTH THE BLOODY MARY AND THE BULL SHOT ARE SEASONED TO TASTE.FORE INSTANCE, TOMATO JUICE IN A BLOODY MARY CAN BE ALSO SUBSITUTED WITH CLAMMATO.

WHAT'S INSIDE A BULL SHOT:

1 oz SMIRNOFF (or whatever vodka you have on hand)
4 oz Beef Broth (Campbells)
.5 oz Worcestershire Sauce
.25 oz Tabasco Sauce
Pinch salt+pepper
Dash of celery seeds
1/4 teaspoon of whole grain mustard
Lemon Slice
Celery Stalk
Dash of Liquid Smoke