Sunday, March 15, 2015

Friends of MT: Old Fashioned Cocktail Mix [Melinda Caliendo]

Intro by Zack:  The Old Fashioned Cocktail is my recent go-to drink at a bar.  I've tried a lot of different interpretations by various bartenders and Mel's recipe is my favorite.  Her recipe balances the strength of whiskey with the sweetness / spice of the mix.  

Mel and Peter are our good friends who were ex-pats in Belgium with us.  We had many good nights talking and laughing over many meals.  They're always cooking up something adventurous and interesting. I hope you enjoy this drink mix as much as I did!!

Mel's Recipe:

My husband, Peter, and I have been cooking, drinking, photographing and sending ridiculous e-mails with Zack and Lauren for nearly seven years now … on two continents. Most recently, we spent a year-and-a-half as neighbors in Antwerp with the Koulermos, including two phenomenal New Year’s Eve parties. Peter and I wanted to whip up a special cocktail to ring in 2015, specifically using homemade Maraschino cherries. Our Old Fashioned cocktail mix is an homage to our Midwestern upbringing (Old Fashioned cocktails made with brandy are particularly popular in Wisconsin, my home state). Here are the easy recipes for Maraschino cherries, Old Fashioned mix, and a proper Old Fashioned cocktail.

1. The Cherries:
After making these, you’ll never use the atomic red ones from the grocery store ever again. Maraschino is a sweet, clear liquor from the Dalmatian Coast. You should be able to find it at any liquor store that has a reasonably sized spirits section. This recipe comes from Ted Allen.

Ingredients:
1 cup Maraschino liquor
1 pint sour cherries, stemmed and pitted, or a jar of sour cherries, drained
Yield:
One pint of cherries that will last in the fridge for a few months

Process:
Bring the cup of liquor to a simmer. Turn off the heat, but leave the pan on the stove. Stir in the cherries gently (you want whole cherries when you’re finished), and let cool completely. Store in a jar and refrigerate.


2. The Mix
Ingredients:
3 cups water
2.5 cups white sugar
3 clementine oranges, quartered
5 or 6 homemade Maraschino cherries
1 cinnamon stick
1 tablespoon of Angostura bitters (or more to taste)
Yield:
About 48 servings

Process:  Bring water and sugar to a boil in a saucepan; remove from heat. Stir oranges, cherries, and cinnamon stick into sugar mixture. Cover saucepan and steep for 1 hour. Remove fruit and cinnamon stick from mixture using a slotted spoon; stir in bitters. Let cool, then store refrigerated. Recipe adapted from Allrecipes.com.


3. The Cocktail
60 ml Bourbon, Rye whiskey, Brandy or classy spirit of choice
20-30 ml of Old Fashioned mix
2-3 ice cubes
2-3 dashes of bitters (or to taste)
Maraschino cherries, to garnish
Yield:
One delicious, sexy beverage.

Process:
In a rocks glass, combine the mix and the bitters. Add the ice cubes, then pour whiskey over. Garnish with cherries. 


Sip sophisticatedly. Or not.

Song: You Send Me - Sam Cooke

Monday, February 2, 2015

Friends of MT: Tincho’s Classic Caramelised Garlic Bruschetta with Roquefort [Tincho]

Intro by Zack:  Tincho does a great job explaining how we met in his post.  We became running buddies at work and our friendship took off from there.  His excitement for life is apparent in his post below.  He gave me a jar of this awesome caramelized garlic.  I couldn't contain myself and would sneak over to the fridge to eat these straight out of the jar!


Degree of difficulty: Easy
Time: 40 minutes to prepare the garlic, 10 minutes for the bruschetta
Serves: ~10 as an appetizer

I realised that I need to start my recipe with an Introduction. I’m afraid I don't have a funny one like the Bang Bang Shrimps (my introduction to this blog) but I will try something to capture the attention of the Koulermos family.

I met Zack thanks to our Johnson & Johnson Running Team in Brussels and I suddenly realised how enthusiastic he is with…. well, everything haha. We shared trainings, races (where I also met Lauren - another super enthusiastic person), beer tasting, photography, cycling and yes, cooking. I must admit that I was more on the ‘learner’  zone while Zack looked like a pro in most of the areas. I can still kick his ass drinking beer and doing long races like a marathon :)

Anyway, during the discussion of what to cook for his farewell, he mentioned the famous Bang Bang Shrimps, and the blog. I was like WTF are the Bang Bang but after tasting them, I can say that I agree with Justin (or whoever he is) that they are as good as sex. I even did it for Christmas and they were a unique success.

So, Zack showed us (the A team of running that includes Noemi and Dominika - two ladies also eager to take most of life and who also did the Amsterdam Marathon with me) the blog and encourage us to participate…  and I thought about my Classic Garlic Bruschetta.

I love this appetizer since the Garlic can be stored in a jar in the fridge and use it to welcome guests anytime. And the combination of flavours gives a lot with such a little effort. I took this recipe from a magazine and I’ve been cooking it for the last 3 years.
So here we go… hope you enjoy it.


Caramelised Garlic
Ingredients:
1)    1kg of garlic cloves peeled off like Mama Tommy’s logo (this is the only challenge of the recipe - see below (*1) )
2)    250 gr. of black sugar. (I reinforced black since it is not brown. This is the secret ingredient and I could not find it in Brussels so I was shipping it from Buenos Aires :))
3)    200 ml of balsamic
4)    200 ml of soy sauce
5)    Thyme - as much as you like
6)    Rosemary - as much as you like… again
7)    Olive oil - see quantity below

PS: I usually prepare less than 1kg of garlic since it could be too much but up to you

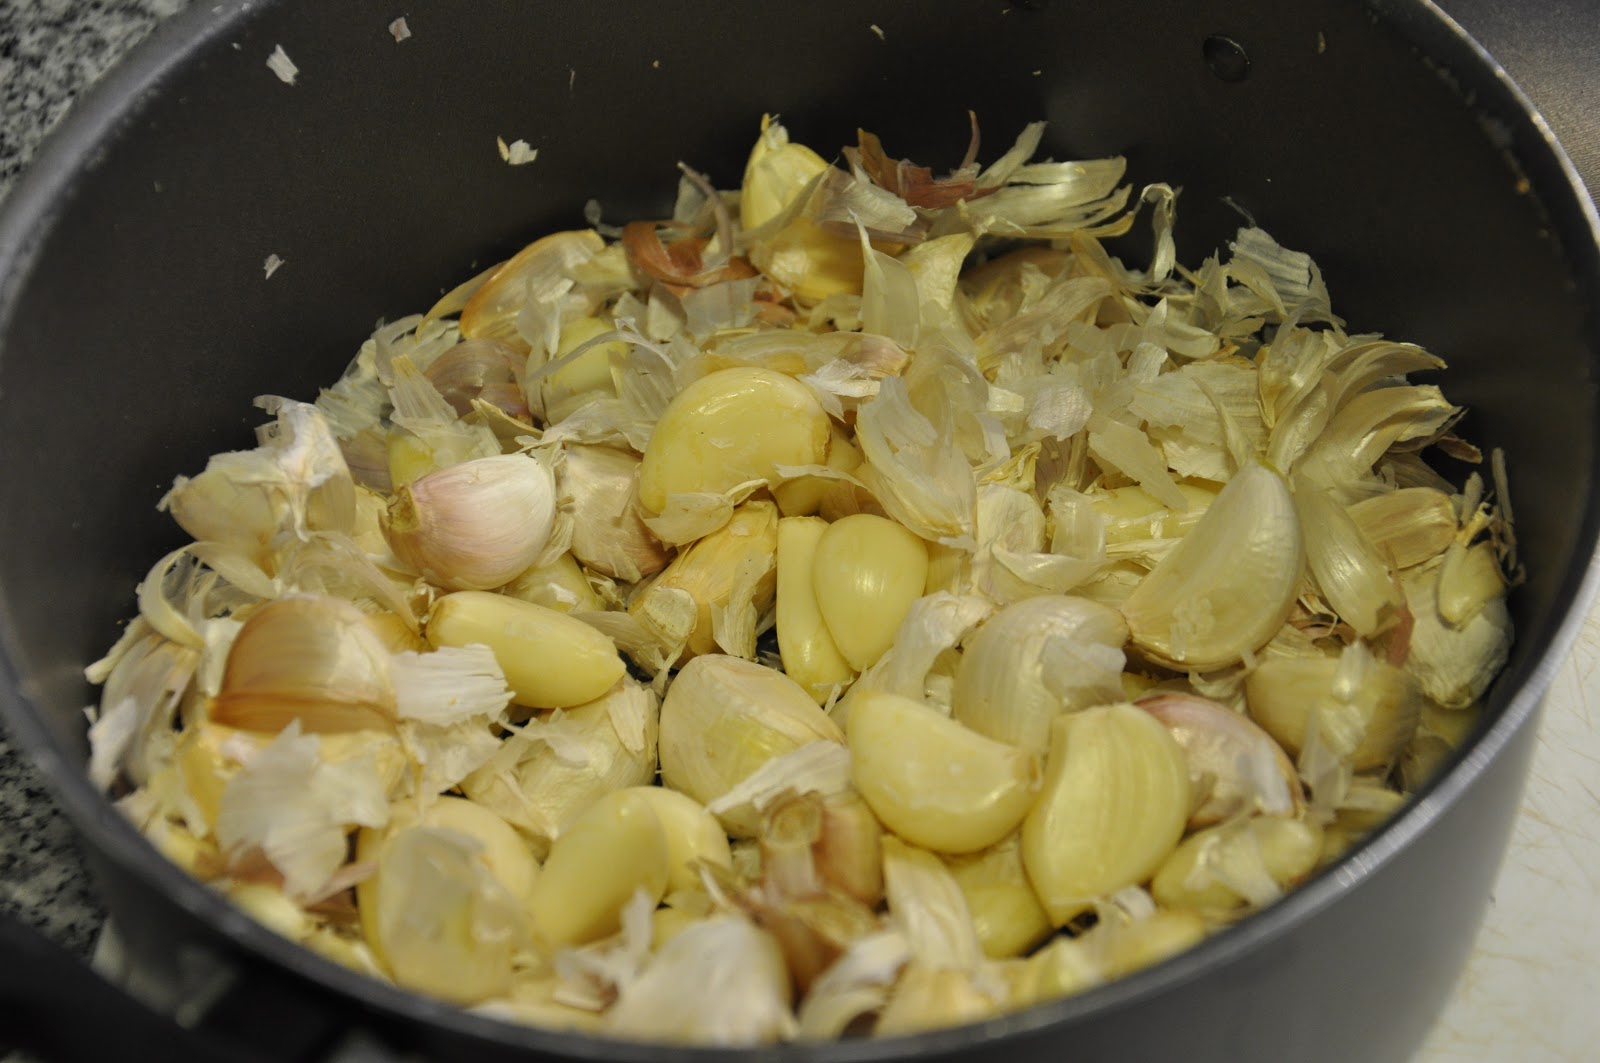
OK, hands on work. But referring to the challenge in (*1), your first question could be how in earth am I going to peel such a quantity of garlic?. First time I did it, I followed the traditional way of peeling the cloves one by one. It took me ages and it was not fun at all. But don't worry, there are solutions for everything. Thanks to sharing this recipe with other friends, one of them found an interesting technique of peeling them in seconds. Yes, it is not a typo, it is seconds. Even my Mom (an experienced cooker) did not believe me, but it amazingly works and adds some fun to the cooking and a lot of noise !! Be careful with your neighbors.

In a nutshell, you just need to put the garlic into two metal bowls and shake them hard. No, Justin, I am not taking about Bang Bang Shrimps or sex :)
Here you have a photo of my own peeling and a youtube video in case you are as skeptic as my mom.


And now? The easy part.
Once the noisy experience is completed, just put the peeled garlic in a pot with the rest of the ingredients and cook them at a low fire. Olive oil is just to make sure you cover the surface of the garlic. Thyme and Rosemary at your own taste. I use a lot since it does not harm.

Approximate time of cooking is 30 minutes.


Cook them until the garlic is tender (see pic). Let them cool down and save them in jars in the fridge as shown below.


Bruschettas
Ingredients:
1)    Bread for bruschetta (we call it country bread in Argentina but I think Cottage Loaf is the same)
2)    Roquefort cheese
3)    Rucola
4)    One clove of uncooked garlic (not the same one as above)
5)    Olive Oil
6)    And the Caramelised Garlic, of course :)

First thing is to slice the bread, use the uncooked garlic to scrape it in the bread and pour a little bit of olive oil on it as well. Then cook it in a very hot oven to make them crispy.


While waiting the bread, start cutting the cheese in cubes. Do the same with the caramelised garlic. Wash and cut some rucola.

Once the bread is ready, add the rucola, the cheese and the caramelised garlic (in this order) as you can see below. Spread some of the liquid in the jar on top for more sweet flavour and Voilá!


Ps: Ok, not my best pic here I must admit. It is the second round. I was so excited serving this during Christmas that I forgot to make the official picture of the first round that was looking much better :)

Enjoy it and thanks to Zach for encouraging me to take pics while cooking and write this down. It was a lot of fun!

Suggested soundtrack: Blackbird Album - Fat Freddy’s Drop

Tuesday, January 27, 2015

Israeli Vegetarian Lentil Soup [Zack]

Winter is raging outside and I wanted something to comfort my insides.  I chose to cook one of my favorite soups from an awesome little restaurant named Beni Falafel in the Jewish quarter of Antwerp.  They are known for making great falafel sandwiches, but I also really enjoy their lentil soup which is healthy, vegetarian, and kosher.

My version is very close to the original - I used lots of lentils, potatoes, red pepper, spinach, onion, garlic, and whole cumin seeds.  You'll feel like a super hero when you're finished eating - it's filling but doesn't feel heavy. 


Process:

Slice and dice all of your veggies.  

In a pot over medium heat, add 2T of olive oil and your onion, red pepper, and diced mushrooms.  Saute for about 5 minutes, then add the garlic and cumin seeds.  Cook for another 1-2 minutes until fragrant.  Dump in the potatoes, tomato, and your veggie stock.  

Add 3 handfuls of lentils to the pot (check for stones first) and bring to a simmer.  Lower the heat to low and place the lid on top a bit askew.  Cook the lentils for about 30-45 minutes depending on your texture preference.  

Add the spinach during the last 3 minutes of cooking and serve hot.  A small squeeze of sriracha can add some heat and a bit of sweetness to the soup.

You'll warm away any winter blues!

Ingredients:
1 medium red onion, sliced
1 red pepper, diced
6 baby bella mushrooms, diced
2 cloves garlic, minced
1T whole cumin seeds
1 tomato, diced
8 golf ball-sized baby red potatoes, diced
3 handfuls of green lentils
1 quart (1 liter) veggie stock
1-2 big handfuls of spinach
salt and pepper to taste
squeeze of sriracha if desired

Song: D'Angelo - Betray My Heart

Tuesday, November 11, 2014

Stracotto (Italian Pot Roast) over Pappardelle. (June)

It evens gets cold in Florida and when the temperature dropped the other day, I was thinking of "comfort food".  One of our favorite restaurants, Brio Tuscan Grill, had sent an e-mail with this recipe and it sounded perfect for a chilly Sunday dinner.

Ingredients

3 tbsp Olive Oil
2 Lbs Chuck Roast
1 Cup Chopped Onion
1 Cup Chopped Celery
1 Cup Chopped Carrots
4 Cloves Garlic, Sliced
1 Cup Beef Broth
1 Can (16 oz) Tomatoes, Diced
3 tbsp Tomato Paste
1 tsp Chopped Garlic
1 tsp Pepper
1/2 tsp Salt
1/2 tsp Dried Thyme
1 Bay Leaf
1/2 Cup Red Wine
1/4 Cup Chopped Parsley
1 Lb Pappardelle (recipe below for homemade or use store bought)

Heat oil in a Dutch oven.  Add chuck roast, sear on all sides, remove & set aside.


Add onions, celery, carrots & slivered garlic to the pot.  Cook until soft - about 10 minutes.  Remove from pot and set aside.


Place rack in bottom of the pot. (I didn't have one so I used a small, disposable aluminum pan)  Place roast on rack & add beef broth. Bring to a boil, reduce heat and simmer for 1 hour.

Preheat oven to 350.  Remove roast and cut into 1/2" slices.  Remove rack and return sliced meat to the pot.  Add tomatoes, tomato paste, chopped garlic, pepper, salt, thyme, bay leaf, red wine and cooked vegetables to pot. 


Bake covered for 1 1/2 hours or until meat is falling apart. Discard bay leaf.  Add parsley, heat through.  Cook pappardelle according to recipe or package directions.  Serve the meat and sauce over the pappardelle.


Homemade Pappardelle
 
1 3/4 Cups All-purpose Flour
1 Cup Semolina Flour
6 Large Eggs
4 tsps Extra Virgin Olive Oil
 
Sift both flours together on a large work surface & make a well in the center.  Place the eggs, olive oil and a pinch of salt in a bowl and break up with a fork.  Gradually add the wet ingredients into the flour mixture and mix just until combined. Using your hands works best!


Knead the dough until smooth and elastic.  Divide dough in half and pat into balls, wrap in plastic and refrigerate for at least 30 minutes or overnight.  (you can freeze one ball for later, or roll both and freeze cut pasta)


Place one ball of dough on lightly floured surface and dust with flour and roll dough into a sheet.  Continue to roll the dough until you can see your fingers through it.  We used our pasta maker to roll out ours.  Let dry about 10 minutes.
 
Dust the top of the sheet with flour and loosely roll into a cylinder.  Using a sharp knife, cut into 3/4 inch wide slices.  Unroll, dust with semolina and lay on a sheet pan until ready to cook. 
 
Not the perfect, even length pasta you might buy, but it was more fun to make it!


Confession!  We didn't get ours thin enough and it took forever to cook.

Wednesday, November 5, 2014

Easy Simple Fast Savory Pie Crust [Zack]

I’m a big fan of keeping a pack of puff pastry sheets in my freezer because I’m normally too lazy to make crust the traditional way.  We were in the mood to make a breakfast quiche and I realized we didn’t have any of the puff pastry sheets.  We found a 4-ingredient recipe online that took about 5 minutes to make.  It cuts out the fuss of using a food processor or letting it rest in the fridge.  As a bonus, it ended up having a better flavor and texture than the puff pastry sheets!  It was more firm and crumbly. 


Process:

Mix the flour and salt together.  Add a few ice cubes to a glass of water, and stir vigorously with your finger.  Loosely mix the oil and water together in another bowl.

Gradually stir the liquid into the dry ingredients.  Use a fork to mix together.  Once it's all combined, if it's still sticky, add a touch more flour until it becomes solid.  Roll the dough out on a lightly floured surface into the shape that you need.

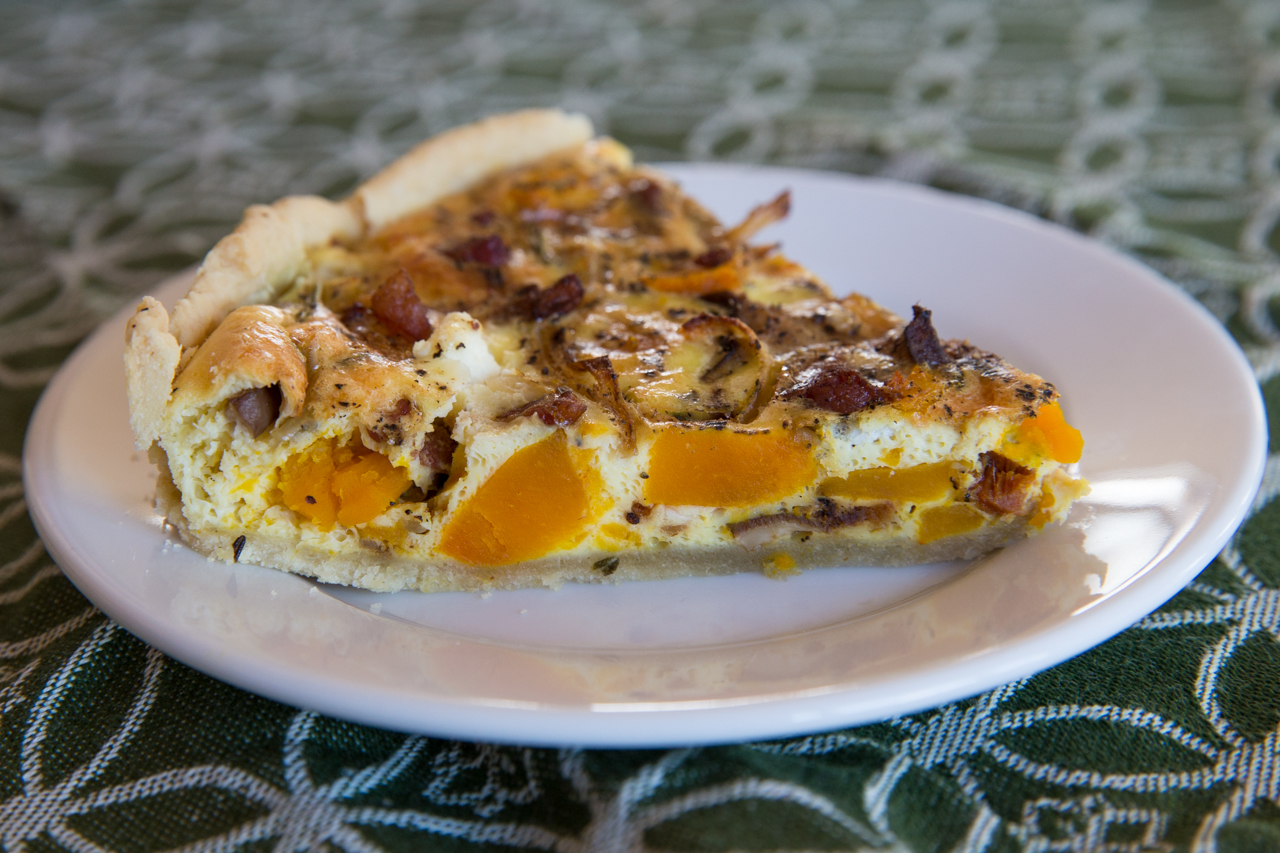
Add quiche ingredients (I used roasted pumpkin, crispy bacon, shiitake mushrooms, feta cheese, and rosemary).  Bake for 35-40 minutes at 375F/185C.


Ingredients (recipe from Food.com)
1 cup flour
1/4 cup ice cold water
1/4 cup olive oil
1/2 tsp salt

Song: Mathieu Boogaerts - Ondule 

Thursday, October 30, 2014

Black Truffle and Shiitake Mushroom Fettuccine [Zack]

It happened folks.  Lauren and I bought a truffle slicer.  There’s a great mushroom stand at the Antwerp Saturday market and they had some “early season” truffles that were surprisingly not expensive.  The best truffles cost more than cocaine by weight, but we paid a total of around $7 for the amount we used to top our pasta (still was great).  And of course, we needed a truffle slicer to shave the truffle.


Truffles are a weird ingredient.  The biggest impact to your final dish is the funky aroma that they add when the plate is placed in front of you. In terms of value add:  the order is smell > texture > flavor.  Freshly shaved truffles are nice, but if you are in the mood for a mushroom extravaganza, you’ll have to add something else to further boost the mushroom flavors.

Hence, we made a pasta with sautĂ©ed shiitake mushrooms, pecorino cheese, parmesan cheese, and some freshly shaved truffle on top.  It was heaven.


Process: 

Start by slicing your shiitake mushrooms and mincing your garlic.  Also, grate both cheeses.  Get a pot of salted water boiling.


Start up a sautee pan over medium heat, large enough to hold both the mushrooms and the pasta (later on).  Add the 3T of butter and 2T of olive oil when the pan is hot.  Toss in the mushrooms and sautee until they are browned.  Add the garlic to the pan and immediately take off the heat so the garlic doesn't brown.


Boil your pasta per the instructions for al dente on the package.  Grab a coffee mug and reserve 1/2 cup of pasta water.

Add the pan with the mushrooms back to the stove over medium heat.  Strain the pasta and add it in with the mushrooms and garlic. Toss the cheese, cream, and pasta water in with the pasta.  The liquids will combine with the cheese to make an awesome sauce.  Crack lots of black pepper on top.

To serve, go crazy with the truffle!  


Ingredients:
½ pound fettuccini pasta
~15 medium shiitake mushrooms, sliced
3T butter
2T olive oil (or you can get crazy and use half truffle oil!)
2 fat cloves garlic, minced
2T cream (to taste)
1/2 cup pasta water
1/3 cup finely grated pecorino romano cheese
1/3 cup finely grated parm reggiano
freshly cracked black pepper
freshly-shaved truffle

Song:  ZHU - Faded

Tuesday, August 19, 2014

Pork Belly Confit with Truffle Honey [Zack]

Confit pork belly is one of the best things you can make in your kitchen.  The belly of a pig is what is commonly used to make bacon.  Instead of the usual curing and smoking process to make bacon, you should try confit. 

When you look at the cross-section of pork belly, you’ll see alternating layers of meat and fat.  The confit process transforms the meat part into a delicate pulled pork-type texture and the fat becomes soft and creamy.  When you want to serve the belly, cut it into cubes, sprinkle with a bit of sea salt, and crisp the outside.  You can choose to top it with a sauce or glaze, or just eat it right out of the pan.  I chose to drizzle the crispy belly with truffle honey.  That was a good decision.


This is a 5-ingredient recipe: pork belly, some type of cooking fat, salt, pepper, and truffle honey.  It takes a bit of time to make, but it’s all idle time, not hard work.

Process:

Ask your butcher for as much pork belly as you’d like to cook (a.k.a. how big is your pot?)  Make sure they take the bones out of the underside so you don’t have to deal with those later.  The more square the cut is from the butcher, the better your outcome will be in the end.  But I never bother with a square cut – I consider the extra scraps I cut off bonus nibbles.

Take the belly home and cure it.  I covered it with a generous amount of sea salt and black pepper and put it in a covered container in my fridge.

After about 2 days, take the belly out and wipe off the excess salt.  Place the belly in an oven-proof pot and submerge it completely in fat.  I used a combination of pork fat and canola oil, but any non-flavored oil will suit.  Bring the pot to a gentle simmer.

Cover the pot and place it in an oven at 300F/150C.  The cooking time will vary depending on how thick the belly is.  Mine took around 5.5 hours.  You know it’s finished when a knife slides into the meat side easily (similar to ribs). 

Remove the pot from the heat and let it cool off.  Place the belly in the fridge – it will keep for a week or so.  Theoretically it should not spoil as long as it’s submerged in fat and you discard the meat juice. 

The belly is easier to slice if it’s straight out of the fridge.  Remove the skin.


Cut the pork belly into cubes or strips.


Place it into a cold frying pan with a little bit of the confit fat and crisp all of the sides over medium heat.


If you’re using a glaze, pour off the excess fat and gently coat all sides of the belly.  If you can find some truffle honey, use that.


Drizzle the honey over the pork belly when it's still hot.


Enjoy!

Ingredients:
Pork belly (skin on or off, up to you)
Sea salt
Black pepper
Pork fat or other type of non-flavored oil
Truffle honey

Glaze ideas:
A sticky hoisin sauce glaze (from this recipe)
Roasted red pepper puree and honey
Honey with rosemary and garlic

Song: Paolo Nutini - Let Me Down Easy 

Tuesday, July 29, 2014

Panko Crusted Shrimp with Honey Garlic Szechuan Glaze [Zack]

You can’t beat bang bang shrimp, but this recipe is close!  If you’re not in the mood for the savory/spicy mayonnaise flavor of bang bang, this sweet alternative is akin to the sauce for General Tso’s Chicken.  You’ll crisp up some shrimp with a combination of corn starch and panko.  Then you lightly toss the shrimp in a honey szechuan sauce.  Coat with sesame seeds and some cilantro, and wow your guests!  These would be a welcome addition to a salad, on top of rice, or on a party platter with tooth pics in them. 


Process:

Defrost your shrimp – I am lazy and buy the de-veined and de-shelled shrimp.  Pour the water off of them and place them on a towel.

Crush your szechuan peppers.  


Mince the garlic.  Add 1T of sesame oil to a sauce pot over medium heat.  Saute the minced garlic in the oil and then add the ground szechuan pepper for 1 minute.  


Spoon honey into the pot, and add the fish sauce and soy sauce.  It should bubble as the water cooks out. 


In a bowl, combine about 50% corn starch and 50% panko.  The corn starch will create a crust and the panko will give the shrimp more texture.

Heat up a frying pan over medium heat and coat the bottom in a light layer of non-flavored oil.  Toss the shrimp in the corn starch and panko mixture.  The crusting will stick to the shrimp because they are a little bit damp.  Cook in the frying pan on both sides until light golden-brown and cooked through.


Check on your honey szechuan sauce.  After 10 minutes, it should stop bubbling so much and the viscosity should return back to the original honey thickness.  


Be careful not to cook the sauce too long, or else you’ll be left with a hard caramel.  If this happens, add a touch of water to return it back to the honey consistency.  Also note, as the sauce cools off, it will noticeably thicken.

Toss the shrimp lightly in the honey sauce.
  

Top with sesame seeds and cilantro and serve hot.


Ingredients (for about 30 medium shrimp):
4 heaping T of honey
2 cloves garlic
3 dried Szechuan peppers
1T sesame oil
1/4 tsp fish sauce
1T soy sauce

30 medium shrimp
panko and corn starch in equal quantities to coat the shrimp
vegetable or canola oil
sesame seeds
cilantro

Song:  Mar - Man x Woman