Showing posts with label Fish. Show all posts

Monday, September 16, 2013

Spinach Fettuccine w/ Seared Scallops [Matt]

I've never attempted to measure my ingredients for making pasta. Half the fun comes from getting your hands into the dough and adding pinches of things as you go along. Here's my best attempt at the process of making fettuccine (supplement with YouTube videos if you're more of a visual learner).

Fettuccine Ingredients:
4 Whole Eggs
3 Additional Egg Yolks
3 Cups Unbleached All-Purpose Flour
1 Tablespoon Olive Oil
1/3 Cup Half-&-Half
1 Teaspoon Sea Salt
(For Spinach variation, food process 2 cups spinach into a minced consistency and add to the bowl)

Since I have no one to impress with fancy cooking antics, I mix my dough in a large mixing bowl. This saves me from dealing with the mess of yolks ingrained into my counter top and keeps flour from going in every direction.


Dump the 3~ cups flour into the large mixing bowl. Make a divot in the center of the flour to put your eggs. Add in the 4 whole eggs and 3 additional yolks (please, do yourself a favor and splurge on the 'cage-free organic'. It REALLY does make a difference with end pasta texture). Add the olive oil, half-&-half, sea salt and spinach (if you're swinging that way).

I use a solid-state whisk to slowly start blending the eggs together. You want to gradually start pulling in flour until it clumps to the point where you wonder why I told you to use a whisk in the first place. Scrape the dough off the whisk with your fingers. Start mashing the dough together in the bowl with your hands until it doesn't really seem like any more flour is getting added to your ball. 

Remove the semi-dough ball from the bowl, flour your counter, and pretend your dough ball is a Bop-It (twist-it, turn-it, mash-it, press-it, etc?). Once your dough ball has reached the strange state of firming up, yet a bit smooth when pulled, put the ball aside under a damp dish towel. Let it rest while you set up your pasta crank.

Once your pasta crank is together, make sure you have some place to rack your pasta. I use pasta rack trees. They're dope.

Take a pinch of dough, you'll really have to eyeball it, and run through the crank in descending numerical order. Fold the dough over a few times when putting it through the initial notch 8, eventually progressing down to notch 2 (second to last as far as thickness).


I recommend dusting your counter / the bottom of the rolled pasta sheet with flour. This will help prevent the pasta sheet from sticking as it slides through the machine.

Run the sheet of dough through the fettuccine crank attachment. Take the shaped pasta and hang it on your drying rack(s). Do this until you're out of dough. 

Scallop Ingredients: 
1 lb Large Bay Scallops
Butter
Salt
Pepper 

Get a big pot of water boiling - add in a splash of olive oil and pinch of salt. This helps the pasta from sticking to itself and raises boiling point. 

Take out your favorite large searing pan. Lightly coat the bottom with melted butter as you bring the heat up to med-high. Lightly dust both sides of the scallops with salt and pepper, then plop them onto the pan. It's key not to shift their position or turn them over until the bottom of scallops have a proper light brown sear, otherwise the meat will tear. The sear will take around 2 - 3 minutes on each side pending heat. The key is to get that golden brown without over cooking the scallops. 

When you are about to turn your scallops over, add your pasta to the boiling water. The pasta, since it's fresh, should only take 2 - 4 minutes to cook (depends on thickness of pasta vs. water temp). Pull out a strand or two and be sure to try it before dumping it into the sieve. 

Time to multi-task. Flip your scallop, then start to heat up a third pan. Add in a splash of olive oil on medium heat to the fresh pan. When your pasta finishes boiling, sieve it, then shake it to get any remaining water out. Dump the pasta into the heated oil. Sauté the pasta for about a minute and a half, then plate. Your scallops will probably finish cooking before the pasta, so put them to the side to rest.

To go next-level, like the dish below, you can sauté onion, asparagus and prosciutto before adding in you pasta. This will take a bit more planning and should be started right around when you dump you pasta in to begin boiling.

Finish with some fresh grated lemon zest and parmesan reggiano.


Best of luck and feel free to experiment once you get the hang of it!


Tuesday, April 16, 2013

Beer Battered Mexican Fish Tacos [Zack]

I don't cook fish very often.  I like it, but never really prefer it over a veggie or meat dish.  So I can say that my wife knows me pretty well judging by the note she left me (click to enlarge):


Since I was cooking for myself and I had some leftover guacamole and tortilla shells, I figured I'd try to beer batter the white fish.  You know, make it healthy.


The beer batter is extremely simple to make.  You pour everything into a bowl and stir it.  If it's slightly thinner than pancake batter, you're ready to coat something with a delicious crunchy armor.  The bubbles in the beer and the baking soda make the coating very light and crispy.  The cumin and paprika give it a nice Mexican flavor and color.

Process:

Gather your beer batter ingredients:


Slice your fish into finger-sized strips.  I cut against the grain so it flakes once cooked.  Make sure you check for small bones in your fish (if you find some, needle-nose pliers or tweezers can pull them out without damaging the flesh).

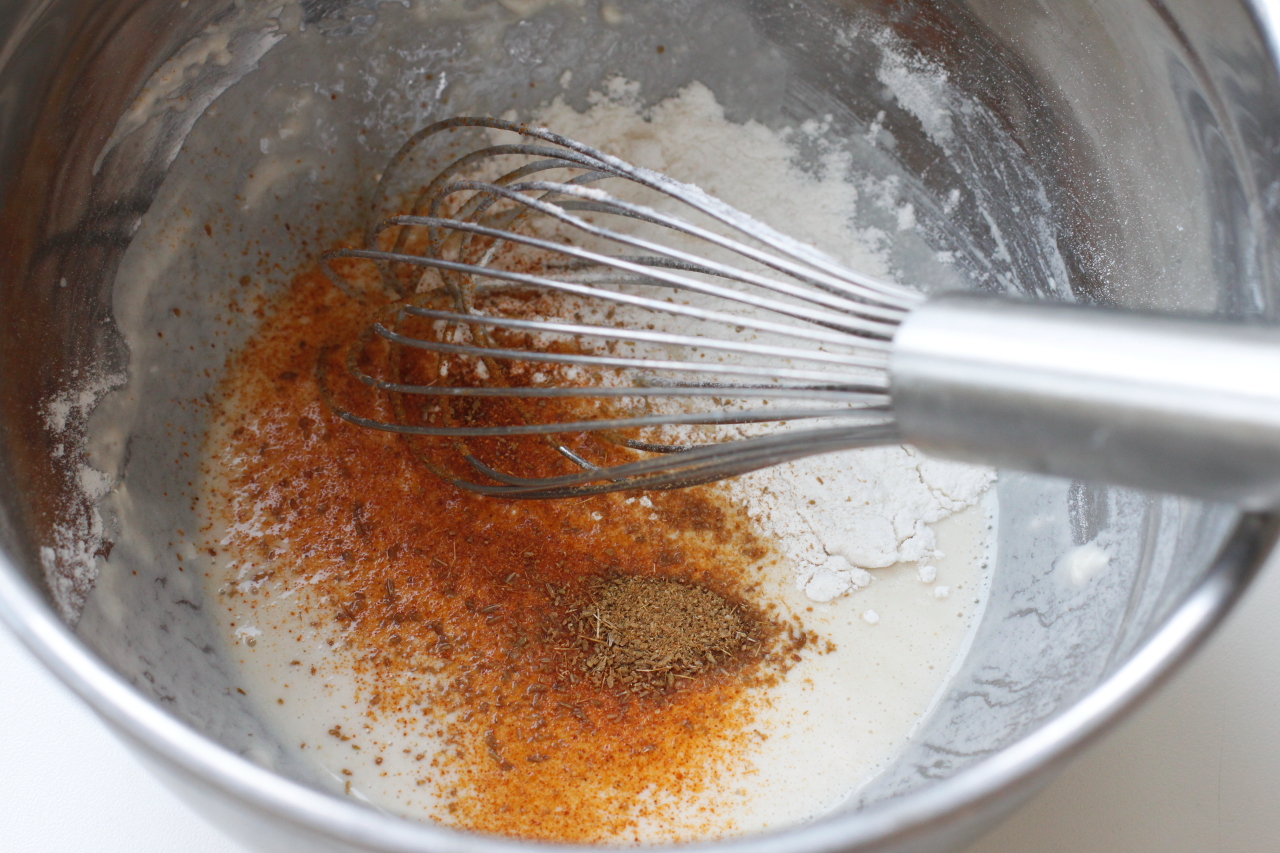
Prepare your beer batter:  pour the flour, beer, baking soda, salt, and seasonings into a bowl.


If you have whole cumin seeds, you can grind them with the mortar and pestle.  I like the flavor better :)


Whisk together to combine everything, but don't over-mix it - you'll beat out all of the bubbles in the beer.  It should be similar to a thin pancake batter.


Ready any garnish that you need for your tacos and heat up your pan on medium heat.  Also, warm your taco shells up.  For garnish, I chose to have guacamole, sliced tomatoes, sliced onions, cilantro, and a splash of lime juice.  You can always add sriracha too....

Add enough oil to the pan to coat the bottom with 1/4 of an inch of oil.  Let the oil heat up - you will know it's ready when you stick the handle of a wooden spoon in it and it bubbles quickly.

Toss your fish fillets in the beer batter and gently place them in the oil.  Cook them the same way you would cook pancakes (wait until the bottom browns around the edges, then flip!)


Once both sides are golden brown, take them out of the pan and transfer to a plate covered with a paper towel to absorb the excess oil.


Put the fish fillets directly into the taco or tortilla shells, garnish, and serve quickly while they are still warm.


Ingredients (makes about 5 tacos):
2 filets of white fish
3/8 cup flour
1/2 cup beer
1/4 tsp baking soda
1 tsp of salt
sprinkle of paprika
sprinkle of cumin powder

Taco shells or tortillas

optional toppings:
sliced tomato
sliced onion
guacamole
lime wedges
cilantro
sour cream
tomato salsa
etc

Song to fry to:  Jamie Lidell - You naked:
You Naked by Jamie Lidell on Grooveshark

Sunday, January 22, 2012

Tilapia en Papillote [June]

This is an easy-to-make recipe that you can make in advance and just have to pop in the oven. No “cooking skills” required!

IngredientsSpinach Leaves
1 Tilapia Fillet per person (or your choice of fish)
Salt & Pepper
Fresh Dill
Fresh Parsley
Lemon Slices
Capers
Butter
Asparagas spears
**Parchment paper

Tear off a piece of parchment paper largest enough to fold over your piece of fish. (each one is done individually). You can either leave it square or cut and make it round. (round was easier to fold)

Fold your paper in half. Place about 8-10 spinach leaves on one side on the paper to create a bed. Top with fish fillet, add salt & pepper, dill, parsley, 2 slices of lemon, capers, a dab of butter and top with asparagus spears.

Fold paper over and begin crimping paper and work all the way around to seal.


Put on baking sheet and cook at 350 for 15-20 minutes.

Serve in the parchment paper. Just tear open to eat.

Wednesday, December 7, 2011

Flounder with Pineapple Salsa [Tom]


Two servings ~ Easy to prepare ~ Ready in 20 minutes

You will need for the flounder and coating:

2 - Flounder fillets
4 - tbspns Wondra flour
1/8 - tpsns Cumin
1/8 - tspns Chili powder
1/8 - tspns Dried Oregano
2 - tbpsns Vegtable oil

You will need for the salsa:

1/4 - Cup Pineapple chunks canned or fresh
1 - tbspns Diced red onion
1/8 - Cup Diced green peppers
2 - tspns Fresh chopped cilantro
1 - tbspns Lime juice
1/2 - tspns Diced or minced jalapeno or other hot pepper
Dash - Salt and Pepper
2 - sliced scallions

Mix all the salsa ingredients in a small bowl except for the scallions and refrigerate.
Save the scallions to dress the dish at the end.

Heat the 2 tbspns of oil in a frying pan over medium heat.
Place and mix all the dry coating ingredients on a plate.
Coat both sides of the fillets and fry turning the fillets only once after 2 minutes. Cook 2 minutes on each side or until golden.

We served the fillets over yellow rice with peas. Add the salsa either on top or on the side.

Sunday, November 20, 2011

Dishwasher (Engagement) Salmon [Zack]

During our first real conversation, Lauren and I quickly realized that we both really loved cooking (and food).  I was trying to impress her by sharing a new way to cook salmon that she would never believe.  The dish was called "Dishwasher Salmon" and I had read about it in a book by Bob Blummer.  To my surprise, Lauren had already seen the technique on the Ellen show.

I'm guessing you are thinking 2 things:
  • What the heck is "dishwasher salmon"?  
  • I hope he's not going to cook his salmon in the dishwasher.  If he is, I'm leavin.
Well, I hope you keep reading because this recipe is probably the easiest way to cook salmon in the whole world.  In short, all you have to do is dust a few seasonings on a salmon filet, wrap it in foil, and yes, put it on the top rack of your dishwasher. If you wrap the fish enough times, soap is totally cool to use (and highly encouraged!  Clean your dishes and make dinner at the same time - very energy efficient!)

I'm sure a lot of you have heard about "Engagement Chicken."  There's a myth that if a girl cooks a chicken for her boyfriend following this recipe, he'll propose shortly thereafter.  Well we can vouch for "Dishwasher Salmon" as our fail-proof engagement recipe... You just have to be willing to wait five years for it to work!

We just got engaged and I'm proud to welcome Lauren to the Koulermos family, and as the latest blogger on Mama Tommys!


Process:

Here's a picture of what you will need.


Cut a few slices of lemon.  Lay out your first sheet of tin foil and place lemon slices in a row.  Season the skin side of the salmon first with paprika, adobo (or seasoned salt) and brown sugar.


Pick up the salmon and place it skin-side down on the lemon slices.


Season the other side of the fish.


Fold the tin foil over.


Take your next sheet of aluminum foil out and place the side that has all of the folds face down into the next sheet.  Repeat the folding process 4 more times.


Make some room on the top rack of your dishwasher and put your salmon packet in with the rest of the dishes.


Run a full wash and dry cycle.  When it's finished, open the tin foil and enjoy!  Your salmon should be light and flakey.


Welcome to the family Lauren!!

Ingredients (per salmon filet):

1 salmon filet
2 T of brown sugar
3 or 4 lemon slices
1/2 tsp adobo seasoning or seasoned salt
1/2 tsp paprika powder
5 sheets of tin foil

Recommended song: Musiq Soulchild - Don't Change (this may get you engaged too!)

Sunday, September 25, 2011

Sole Meuniere --A $30 entree for $4.21 [Rhonda]


Degree of difficulty: medium

Time: traveling to the seafood market is the most time-consuming part...prep 10 minutes, cook time 5 minutes total

Serves: 1 (Mike doesn't eat fish, so this is a solo entree. But there's usually a bit left over for a raid-the-refrigerator snack. He's always teasing me about my extravagant plating--the garnish, the accompaniments--for one, namely, me. Hey, nothing wrong with that. At all.)


Italians and the French have cornered the market on this dish.

I ordered it constantly when Mike and I would dine out in Manhattan, in Paris, where it came whole (yikes, I'm not so good at de-boning tableside), and in Italy, where the Nona in the kitchen made it explode with flavor by adding a sprinkle of capers while the sauce was reducing and a squeeze of lemon just before serving.

While my at-home version is quite decent, there's something about those restaurant pans and a quick sizzle in loads of butter that yield heavenly results. It's a recipe worth repeating--and varying. Leave out the almonds and add a handful of fresh, diced tomatoes, maybe some basil, or go Mediterranean and throw in some diced pitted black olives with the tomato.

Over time I've experimented by adding a couple of frozen homemade chicken stock cubes to the wine and butter and cooking it down a bit. It gives good flavor, so you use a little less of that naughty butter.

Sole Meuniere
Ingredients:


1/2 pound fresh fillet of sole
3 to 4 tablespoons butter
1/4 cup dry white wine
1 lemon, juiced
1/4 cup (or less) flour
1/4 cup raw whole almonds, chopped
4 sprigs parsley--2 minced, 2 for garnish
3 frozen cubes chicken stock, optional
1 tablespoon capers, optional

Rinse off the fillets, shake dry. Take a smidge of the butter and brown the chopped almonds in it.

Remove from pan, set aside. Melt the remainder of the butter in the pan. Dust the fillets in the flour, and place in the sizzling butter. Brown. (This is the tricky part. You want the fish nicely browned, but not cooked to the point of mushy.)

Remove fillets to a warm plate.

Add wine and chicken stock cubes, if using, to the pan. Reduce by about 1/3. Add some of the lemon juice, and taste the sauce. Add more lemon if needed, and capers if using (or tomato and basil etc.). Reduce for 1 minute. Taste sauce and adjust seasoning (may need a dash of salt or more lemon).

Add minced parsley, stir and pour over the fillets. Sprinkle with chopped almonds. Serve immediately.

Suggested soundtrack: Chopin's "Nocturne in B-flat Minor," Op. 9, No.1. (The guys will recognize this as one of Mom's favorites to play on the piano--they've heard it a million times. Still in my Top Ten.)

Sunday, July 3, 2011

Grilled Bronzed Tilapia [Tom & June]

One of my favorite dishes to order is blackened fish or chicken. Alot of times the chef over-does the seasoning or it's too heavy with black pepper. On a trip to the west coast of Florida, I discovered a happy medium between blackened and "blah" when I saw "bronzed" on a menu. It was perfect - and looked like a piece of fish that had been "bronzing" in the Florida sun! This works for chicken and of course, any type of fish.

So I searched on-line for recipes for the seasoning and with some tweaking, this is our version.


Bronzing Seasoning
1 1/2 tsp Salt
3 tsp Paprika
1 tsp Oregano
1 tsp Garlic Powder
1/2 tsp Dry Mustard
1 tsp Onion Powder
1 tsp White Pepper
1 tsp Basil
1 tsp Thyme
1 tsp Black Pepper
1 tsp Cayenne Pepper

Mix all ingredients. We put it into an empty spice container with a shaker top.

Brush the fish filets with olive oil and sprinkle with a generous portion of the seasoning. Using the brush, dab and brush the seasoning onto the fish to evenly coat. Do the same to the other side. We threw in some zucchini and orange bell peppers to grill for sides.


Grilling fish can be intimidating but it really is easy. If you have a grill basket, you can use that. If not, spray Pam on the grill. IF YOUR GRILL IS HOT - BE CAREFUL THAT IT DOESN'T FLARE UP!

Grill for about 5-7 minutes per side. You only want to turn once, so check to be sure that it's cooked to your liking before turning. Use a spatula and carefully remove.