Tuesday, March 22, 2016

Greek Lamb Burger with Fried Saganaki, Homemade Bacon, and Cilantro Tzatziki [Zack]

I've been on a burger kick lately, but this Greek lamb burger with fried saganaki, homemade bacon, and cilantro tzatziki is my favorite I've ever made.  I wanted to try to make as much of the burger from scratch as I could (as a personal challenge), but high-quality store-bought ingredients are just as good.


Process:

Start by frying bacon in a medium-low frying pan to render the fat and crisp the bacon.  Remove bacon from pan when crispy and reserve the fat for cooking the lamb burger.

Mince garlic and cilantro, and combine with the mayo.  If you want a smoother presentation, you can put in the food processor or blender for a few pulses.

Toast your buns in advance so you don't have to worry about these later.

Form ground lamb into 3 patties and salt and pepper both sides.

Get 1 non-stick frying pan going over medium heat for the saganaki, and 1 cast iron or regular pan heated up over high heat for the lamb burgers.

Slice the kefalograviera (saganaki cheese) into squares and fry in a little bit of olive oil until crispy on both sides.  You can squeeze a bit of lemon on top if desired.

Cook the burger in your hot pan for a few minutes per side until it reaches your desired internal temperature.

Assemble the burger and enjoy!

Ingredients (makes about 3 burgers):
1lb of ~80/20 ground lamb
1/2lb of sliced bacon
3 burger buns

Tzatziki:
1 cup mayonnaise (or Greek yogurt)
2 cloves garlic, minced
1/2 loose cup of cilantro leaves, minced

Saganaki:
1/2 lb kefalograviera cheese (halloumi works here too)
1T olive oil
optional 1/2 lemon

Song:  Marian Hill - Got it

Thursday, January 28, 2016

Braised Teriyaki Beef Short Ribs [Zack]

Many of my latest posts have been teriyaki-obsessed. I can’t help it. It makes everything tasty!

Here is an adaption to a previous recipe for Sous Vide Teriyaki Short Ribs. If you don’t have a sous vide machine (understandably), you can braise the short ribs and get similarly great results.


Process:

Start by prepping the teriyaki sauce that you’ll use for the braise. Mince ginger, garlic, and the chiles.  Saute them in a sauce pot over medium heat in sesame oil, until the onion is translucent. Add in the soy sauce, vinegar, and sugar, and simmer for about 10 minutes.  Taste and adjust as needed.

Slice onions, red/green peppers, and a few jalapenos. Layer the bottom of a roasting pan with them.

Brown all sides of the short ribs in a pan in small batches. You don’t need to salt them – the teriyaki will handle that. When finished, de-glaze the pan with the teriyaki sauce.

Place the short ribs on the bed of onions and peppers, and pour the teriyaki sauce over top.


Cover the pan with foil or a lid, and braise at 300F until tender. It took me about 3.5 hours, but it depends on the thickness of the short ribs.

Remove the short ribs and veggies from the roasting pan and spoon the fat off the top of the remaining teriyaki sauce.  If you put the sauce in the fridge, the fat in the sauce will solidify and you can more easily dispose of it.

Add the teriyaki sauce to a small sauce pot and set over medium heat.  Scoop out about 1/2 cup of sauce into a separate bowl and whisk in 2-3T of corn starch to thicken the sauce.  This will ensure you don't end up with lumps of starch in your sauce.  When the slurry is smooth, add it back into the sauce pot.

Glaze the ribs with the sauce and serve!  I placed the short rib on top of roasted yams pureed with ginger, and topped with pickled jalapenos.

Ingredients:
8 short ribs
1 sliced large onion
1 sliced red pepper
2 sliced jalapenos
~2T of corn starch to add to the teriyaki sauce after braising

Teriyaki Braise Sauce
2T sesame oil
5 few garlic cloves
2 inchs ginger, diced
2 birdseye chiles
2 cups soy sauce
dash of rice wine vinegar
1.5 cups brown sugar (to taste)
a few T of sriracha if desired

Song:  Dizzle Beatz - Frankie Krupnik

Friday, January 8, 2016

Pressure Cooker Shoyu Ramen [Zack]

I’ve always wanted to cook a bowl of Japanese ramen from scratch, but I’ve been overwhelmed by the task.  Despite the fact that I’m willing to spend the large amount of time in the kitchen to make the soup base, the sheer number of conflicting recipes and techniques made my head spin.  There are many different types of ramen soups (Kenji explains here), and each classification of soup has many different recipes (just like Italian grandmas and their red sauce).

I was watching “A Mind of a Chef” with David Chang and he seemed really laid back about the whole process.  After re-watching the ramen scene many times and searching the internet, I gave it my first try.  The result was amazing and the process was actually pretty simple!  I’m going to attempt to explain below:

I made Shoyu Ramen based on a Momofuku recipe I found online.  You make a base stock using kombu (Japanese seaweed), dried shiitake mushrooms, veggie aromatics, chicken bones, and pork bones.  You then make a bacon and chicken-flavored soy sauce “Tare” to mix into the base stock.  Add in noodles, an egg, scallions, roasted pork, and mushrooms and whamo!  It’s ramen.


Since the stock base takes so long to simmer, I ran a side-by-side experiment with a pressure cooker version and a stove top-simmered version.  I wanted to see if I could speed the recipe up.  Both stock bases were full-bodied and delicious, but the pressure cooker took only 3 hours, while the simmering stock pot took ~10 hours.  Below you can find my “fast” version of Ramen using the pressure cooker.  Disclaimer:  this is not meant to be the ultimate authentic recipe, but a good beginner’s bowl of ramen.

Process:

This pressure cooker recipe will produce around 10 bowls of ramen.  If you want to make a lot more since you’re going through all of the work to make the stock, you can double the recipe and use multiple stock pots.  Simmering on the stove gets the same results, it just takes longer.

Start by making the ramen stock base:
Fill your pressure cooker (or multiple pots) ½ way with water.  Set on the stove and bring the temperature up to 150F.  Add the 1.5 oz kombu and 2 oz dried shiitake mushrooms and remove from the heat.  Let it steep like a tea for 1 hour, stirring occasionally.

While the stock is steeping, roast the chicken bones and pork bones in the oven at 425F until browned – about 45 minutes.  No need to salt or season them.  Reserve the pans after roasting so you can scrape the delicious fond into the stock pot.


Remove the kombu and shiitake mushrooms from the pot and reserve the shiitake.  You can pickle them and use them in your ramen.  


Add the roasted chicken and pork to the pot.  Throw in 1 medium carrot and the roots and white parts of 1 bunch of green onions.  Add a bit of water to the roasting pans and scrape the brown bits into the stock pot.  It’s free flavor!! 


Add more water until the bones are covered, but don’t over-fill the pressure cooker per the manufacturer instructions (leave 1/3 empty).  


Close the lid and let the pressure cooker work for 3 hours on low heat.  This will produce a super-concentrated stock.

Remove the bones and vegetables and strain the stock through a cheesecloth.  Skim the fat off of the top - you’ll get enough fat in the soup from the bacon tare.

The soy sauce Tare: 
In an oven-proof pan, roast parts of a chicken (I used 1 back, 1 thigh, and 1 leg) at 425F until browned.  Deglaze the pan with the 1C sake, 1C mirin, and 2C light soy sauce, scraping up the brown bits on the bottom.  Add the ½ lb of smokey bacon and simmer over very low heat for 1 hour.  You don’t want to evaporate and reduce the volume of the tare, you just want to infuse it with the chicken and bacon flavor.


After 1 hour, remove the chicken and bacon from the tare and strain out anything left.  You can pick the chicken meat and put it in a soup if you’d like.

Pickle the re-hydrated shiitake mushrooms:

Cut off the tough stems from the rehydrated shiitake mushrooms.  Slice the mushrooms and toss them in minced ginger and the different liquids.  I did 1T soy sauce, 1/2T fish sauce, 1/2T vinegar, 1 tsp sesame oil, 1T minced ginger, and 1T sugar.

Assemble the ramen:

Decide what you want in your soup.  I included:
  • smoked pulled pork shoulder (from another meal)
  • a sous vide egg at 63C for 1 hour - but you can just soft-boil an egg in a pot for 7.5 minutes
  • chopped scallions
  • pickled shiitake mushrooms
  • fresh noodles
Add 1 parts water to 1 part ramen broth and bring to a heavy simmer. 

In the bottom of each serving bowl, mix ~¼ cup of tare (to taste) with the hot broth.  Drop cooked fresh noodles in and arrange the rest of the ingredients around the bowl.


Ingredients (for about 10 bowls of ramen):
Adapted from David Chang's recipe:

Ramen broth:
1.5 oz dried kombu seaweed
2 oz dried shiitake mushrooms
2 lbs chicken bones with some meat left on them
2.5 lbs pork bones with some meat left on them
1 medium coarsely-chopped carrot
1 bunch of green onions (white part and roots only)

Soy Tare:
1 lb chicken parts (1 chicken back, 1 chicken thigh, 1 chicken leg)
1/2 lb smokey bacon
1 cup sake
1 cup mirin
2 cups light soy sauce

Pickled shiitake mushrooms:
Reserved rehydrated shiitake mushrooms from ramen broth
1T soy sauce
1/2T fish sauce
1/2T vinegar
1 tsp sesame oil
1T minced ginger
1T sugar

Ramen garnish:
fresh noodles
pickled shiitake
smoked pork shoulder
soft-boiled egg (or sous vide)
chopped green onions

Song:  James Blake & Bon Iver - Fall Creek Boys Choir

Tuesday, January 5, 2016

Candied Smoked Salmon with Lemon Ricotta Spread on Crostini [Rhonda]


After being AWOL from our family food blog for quite some time--moving to Chicago, settling in, renovating, learning to cook all over again with an electric cooktop--I'm happily back into new food adventures.

This is an appetizer we served over the holidays. It starts with some kind of bread--crostini, brioche toasts, water crackers--gets a dollop of lemon ricotta spread and, in this case, a topping of candied salmon for seafood lovers or pomegranate seeds with herbs for a light alternative.

In the spirit of trying new things, the Canadian candied smoked salmon was a home run. I'm hoping it's not just a seasonal offering from the True North Salmon Company...it was as if brown sugar and applewood smoke had done a happy dance over tender strips of Atlantic salmon. Entire packs of it can disappear while these apps are being assembled.

Lemon Ricotta Spread

2 ounces cream cheese, softened
3/4 cup whole milk ricotta
zest of 1 lemon
juice of 1 lemon, or to taste
salt and white ground pepper

Mix ingredients together, adjust seasonings to taste, spread on crostini and serve.


Tuesday, November 3, 2015

Honey Habanero Teriyaki Glazed Chicken Wings [Zack]

I love making chicken wings.  They're great for any occasion that doesn't involve white clothing (sorry P Diddy).  The most popular recipe on this website is Honey Garlic Sriracha Glazed Wings, so I figured I'd post another favorite wing recipe of mine.  

You start by making a thick, spicy, and salty-sweet teriyaki sauce, and then pour it over roasted chicken wings.  Reduce the sauce to a glaze glaze under the broiler or in a pan, and they're ready to be consumed!


Process:

Lightly salt and pepper chicken wings.  Rub them with a small amount of canola oil and place in an oven at 375F / 180 C.  Cook until almost finished (about 25 minutes based on how close the wings are together), then turn on the broiler to crisp the skin.  Turn the wings over to get both sides golden brown.

While the wings are roasting, de-seed the habanero, and dice it.  Mince garlic and ginger as well.  Saute them all in a sauce pot over medium heat in 1T of sesame oil until fragrant.  Make sure to turn on your fan or the habanero will pepper-spray your house.

Add the soy sauce, rice vinegar, and honey and reduce.  This should take about 10 minutes.  The sauce should be the consistency of warm honey when it's finished.  Take off the stove and let it rest.

Toss the roasted wings in the teriyaki sauce and throw them back under the broiler.  You want the glaze to caramelize but not burn!  If you have not reduced your teriyaki sauce and it's too watery, you can transfer the wings to a pan and the sauce will thicken up more quickly.  This happened to me.


Serve with lots of napkins and enjoy!

Ingredients:
20 chicken wings 1T sesame oil
2 garlic cloves
1 inch ginger, diced
1 habanero, de-seeded (to taste)
1 cup soy sauce
1T rice wine vinegar
2/3 cup honey (to taste)

Song:  Erykah Badu - Hotline Bling

Tuesday, July 28, 2015

Smoked Beef Brisket Sandwich - Leftovers [Zack]

A brisket is a huge hunk of meat to smoke.  Therefore, you'll probably end up with some leftovers.  Instead of just chucking it into your next batch of smoked beans, why not make a nice sandwich?


Ingredients:
Sliced smoked beef brisket
Slaw (shredded cabbage, greek yogurt, sour cream, lemon juice, other veggies)
Dijon mustard
Swiss Cheese
Toasted bread

Song: Red Hot Chili Peppers - Funky Monks

Monday, July 20, 2015

Smoked Beef Brisket Texas Style [Zack]

Aaron Franklin is a BBQ God.  People wait outside of his restaurant for 4+ hours, sitting in lawn chairs and tailgating the line.  He has his own PBS show and youtube channel.  I love how he keeps things simple, with both the recipe and the explanations of "why".  He's not one to do things the easy way, but if you own a smoker, I doubt you like shortcuts either.

This was the first time I've smoked a brisket and it turned out amazingly.  I used Aaron's recipe and it was great.  I'm a new user of the Weber Smokey Mountain 18.5" and I must say they've designed these smokers perfectly.  The heat source, water bowl, and meat are vertically aligned so everything cooks evenly and doesn't dry out easily.  I didn't have to wrap or spray this badboy with anything.  And it's super easy to maintain a constant temperature with a low amount of fuel.  I got by with 1/3 a bag of Kingsford and a few hickory wood chunks in the 10.5 hours of smoking.


Process:

Really, it's best to just watch Aaron Franklin on youtube, but I'll give you the high-level.


Pre-heat your smoker to 225F.  I lugged myself out of bed at 5am to do so.  Organize your coals using the "minion method".  This means pour unlit coals into the smoker, organize some wood chunks around the outside, and make a volcano cavity.  Pour about 12 light briquettes into the center.  The coals will slowly light from top to bottom over time, and will therefore keep the temperature constant.


Rub a brisket with a 50/50 mix of salt and freshly crack black peppercorns.  Season liberally so you have a nice bark in the end.  Place the brisket on the smoker once hits an even 225F, making sure you have a water pan to keep everything moist.


Smoke the brisket for about 10.5 hours (for 8.5lbs, times will vary).  Pull the brisket once the internal temperature reaches 190F.  Note, the temperature will "stall" at around 170F for multiple hours.  I hit 170F at around 2.5 hours and it didn't exceed 174F until about 9 hours into the smoke.

Keep that temperature constant and check the meat as infrequently as possible.  I added some home-cured bacon and homemade BBQ beans on the top rack to keep things interesting.


Once the beef reaches 190F, pull it off the smoker and wrap it in foil.  Let it rest for around 1 hour.

Slice it against the grain.  The grain switches about halfway through.  Again, just watch Aaron explain it.


Fend off everyone until you are finished with your presentation.  They will be dying for scraps.


Ingredients:
8.5lb of beef brisket (trimmed)
salt
black pepercorns, cracked with a mortar and pestle
however many beers you may need to stare at a smoker for ~10.5 hours

Song: Maya Payne - If Only

Sous Vide Pork Belly Porchetta [Zack]

I've enjoyed using my Anova Sous Vide machine for long, slow cooking sessions on big hunks of meat.  It's so much easier to get a perfect, consistent, and repeatable outcome.  I've actually been following recipes that I've found online while I'm learning to use the new tool.

Everyone loves pork belly, and this porchetta recipe is perfect if you want to make something besides bacon.  It's crispy, rich, salty, fatty, and balances well with something light and fresh.  All of the credit goes to my favorite food writer, J. Kenji Lopez-Alt for creating the All Belly Sous Vide recipe.


Process:

Lay the pork belly skin-side down on a cutting board and cross-hatch the inner meat portion with about 1/2 inch diagonal cuts.  Rub salt, crushed black peppercorns, crushed fennel seeds, red pepper flakes, smashed garlic, and rosemary all over the inside.  Roll the belly tightly and tie it with butcher string.

Season the outside of the belly with a 2-to-1 ratio of salt and baking powder.  Vacuum seal the belly and let it rest in the fridge for 12 hours or so.

Sous vide the belly at 155F / 68.3C for 36 hours.  Transfer belly to an ice bath if you're not cooking it right away.

Remove the belly from the pouch and reserve the liquid that it exuded.  You can reduce this down for a sauce if you want.

Shallow-fry the porchetta, spooning oil over it and turning when needed.


Remove from the oil when it's nicely golden brown and crispy on all sides.


Slice, and serve over crusty toast and with some cole slaw to offset the richness.


Ingredients:
See Kenji's Recipe

Song:  Since this cooks for a while, just jam out to James Blake's whole album:  James Blake

Tuesday, July 7, 2015

Sous Vide Teriyaki Beef Short Rib [Zack]

This is by far my favorite recipe to make with the Sous Vide machine (so far).  I've had varied results making teriyaki beef short ribs by braising or simmering.  The flavor has been there, but the ribs would never stay together.  Using the perfect temperature control of Sous Vide, I was able to achieve my ideal consistency of the short rib, while having a better visual presentation.

I like to pair these short ribs with horseradish mashed potatoes and some type of zingy veggie like Kimchi.  Here is a quick snapshot of the process and a rough recipe:


Process:

Prepare your teriyaki sauce first.  Dice the garlic, ginger and chiles and simmer in 1T of sesame oil.  Add the wet ingredients and sugar and simmer the sauce until it's thickened and coats the back of a spoon.  Adjust the sauce as needed.

Vacuum seal the beef short ribs with 2 T of teriyaki sauce per short rib.

Place the rib packs into the immersion circulated water bath at 63C for 48 hours.  Use a plate if they float above the water line.

Remove the ribs from the pouches after the timer goes off and brown all sides of them in a saute pan.  Brush with the teriyaki sauce before serving.


Ingredients:  (qty for 4 short ribs)
1T sesame oil
a few garlic cloves
1 inch ginger, diced
1-2 birdseye chiles
1 cup soy sauce
dash of rice wine vinegar
2/3 cup brown sugar (to taste)

4 beef short ribs

Song:  James Blake - I Only Know

Wednesday, April 22, 2015

Sous Vide Lobster Tail Beurre Monte with Angel Hair Squash Pasta [Zack]

I just got an Anova sous vide immersion circulator.  Sous vide means "under vacuum" in French.  To cook sous vide, seal the food with a vacuum sealer, and then immerse it in a temperature-controlled water bath.  It allows you to precisely control temperature and time to get a perfect outcome each time!  For a steak or other foods that require browning, you can quickly sear it after you've finished cooking in the water bath.

I've been interested in learning how to cook food sous vide because many fancy restaurants use the method.  If you've ever had an impossibly tender steak with the inside perfectly pink from top to bottom, there's a chance it's been cooked sous vide.

I decided to try to cook a lobster tail as my first try with my Anova.  Since seafood gets tough and rubbery if you overcook it, cooking sous vide becomes a cheat-code.


This recipe is for lobster tail Beurre Monte.  The traditional recipe calls for poaching the lobster tails in a pot of butter.  Since I'm using a vacuum sealer, I can use a lot less butter because the lobster tails will still have full contact to the butter inside the bag.  Serve the lobster tails straight out of the bag over a bed of fresh pasta.

Process:

Defrost the lobster tails if frozen.


Start up your sous vide circulator at 54C to get your water up to temperature.

The first step is to remove the tail meat from the shells.  This is apparently much easier if you quickly blanch the tails in salted boiling water for 45 seconds.  So, do that.

Cut shell down the middle with kitchen shears and carefully separate the meat from the shell.  This will take a few minutes and is the hardest part of the recipe.

Place the tail meat in a vacuum sealed bag.  Make sure that the bag has enough area around the tail(s) so you get a proper seal.  Add in 5 pads of butter and 1 sprig of thyme per tail and vacuum seal it.


Submerge the sealed tails into the water bath and cook at 54C for 30 minutes.


If they float, make sure to put a plate on top of them so they are totally under the water.


While this is going, you can cook your pasta dish.  Get your water boiling.  Slice the squash, and dice the onions and garlic.  Heat up a pan over medium heat and add butter and olive oil to the pan.  Saute squash, yellow onion, and garlic for about 5 minutes.

Cook the pasta when you're ready to serve the lobster.  Toss the pasta with some grated parmesan cheese and the veggies.

Remove the lobster bags from the water.


Slice open the bag and slice the tails.  Serve over the pasta.  If some lobster-flavored butter from the bag happens to make it on the noodles, keep it a secret.


Ingredients:
1 lobster tail per serving
5 pads of salted butter per tail
1 sprig of thyme per tail

1/2 lb of angel hair pasta (serves 4)
1 green squash
1 yellow squash
1 white or yellow onion
2 cloves garlic
1/2 cup grated parmesan reggiano
freshly-cracked black peppercorns

Song:  Stromae - Quand C'est

Sunday, March 15, 2015

Friends of MT: Old Fashioned Cocktail Mix [Melinda Caliendo]

Intro by Zack:  The Old Fashioned Cocktail is my recent go-to drink at a bar.  I've tried a lot of different interpretations by various bartenders and Mel's recipe is my favorite.  Her recipe balances the strength of whiskey with the sweetness / spice of the mix.  

Mel and Peter are our good friends who were ex-pats in Belgium with us.  We had many good nights talking and laughing over many meals.  They're always cooking up something adventurous and interesting. I hope you enjoy this drink mix as much as I did!!

Mel's Recipe:

My husband, Peter, and I have been cooking, drinking, photographing and sending ridiculous e-mails with Zack and Lauren for nearly seven years now … on two continents. Most recently, we spent a year-and-a-half as neighbors in Antwerp with the Koulermos, including two phenomenal New Year’s Eve parties. Peter and I wanted to whip up a special cocktail to ring in 2015, specifically using homemade Maraschino cherries. Our Old Fashioned cocktail mix is an homage to our Midwestern upbringing (Old Fashioned cocktails made with brandy are particularly popular in Wisconsin, my home state). Here are the easy recipes for Maraschino cherries, Old Fashioned mix, and a proper Old Fashioned cocktail.

1. The Cherries:
After making these, you’ll never use the atomic red ones from the grocery store ever again. Maraschino is a sweet, clear liquor from the Dalmatian Coast. You should be able to find it at any liquor store that has a reasonably sized spirits section. This recipe comes from Ted Allen.

Ingredients:
1 cup Maraschino liquor
1 pint sour cherries, stemmed and pitted, or a jar of sour cherries, drained
Yield:
One pint of cherries that will last in the fridge for a few months

Process:
Bring the cup of liquor to a simmer. Turn off the heat, but leave the pan on the stove. Stir in the cherries gently (you want whole cherries when you’re finished), and let cool completely. Store in a jar and refrigerate.


2. The Mix
Ingredients:
3 cups water
2.5 cups white sugar
3 clementine oranges, quartered
5 or 6 homemade Maraschino cherries
1 cinnamon stick
1 tablespoon of Angostura bitters (or more to taste)
Yield:
About 48 servings

Process:  Bring water and sugar to a boil in a saucepan; remove from heat. Stir oranges, cherries, and cinnamon stick into sugar mixture. Cover saucepan and steep for 1 hour. Remove fruit and cinnamon stick from mixture using a slotted spoon; stir in bitters. Let cool, then store refrigerated. Recipe adapted from Allrecipes.com.


3. The Cocktail
60 ml Bourbon, Rye whiskey, Brandy or classy spirit of choice
20-30 ml of Old Fashioned mix
2-3 ice cubes
2-3 dashes of bitters (or to taste)
Maraschino cherries, to garnish
Yield:
One delicious, sexy beverage.

Process:
In a rocks glass, combine the mix and the bitters. Add the ice cubes, then pour whiskey over. Garnish with cherries. 


Sip sophisticatedly. Or not.

Song: You Send Me - Sam Cooke

Monday, February 2, 2015

Friends of MT: Tincho’s Classic Caramelised Garlic Bruschetta with Roquefort [Tincho]

Intro by Zack:  Tincho does a great job explaining how we met in his post.  We became running buddies at work and our friendship took off from there.  His excitement for life is apparent in his post below.  He gave me a jar of this awesome caramelized garlic.  I couldn't contain myself and would sneak over to the fridge to eat these straight out of the jar!


Degree of difficulty: Easy
Time: 40 minutes to prepare the garlic, 10 minutes for the bruschetta
Serves: ~10 as an appetizer

I realised that I need to start my recipe with an Introduction. I’m afraid I don't have a funny one like the Bang Bang Shrimps (my introduction to this blog) but I will try something to capture the attention of the Koulermos family.

I met Zack thanks to our Johnson & Johnson Running Team in Brussels and I suddenly realised how enthusiastic he is with…. well, everything haha. We shared trainings, races (where I also met Lauren - another super enthusiastic person), beer tasting, photography, cycling and yes, cooking. I must admit that I was more on the ‘learner’  zone while Zack looked like a pro in most of the areas. I can still kick his ass drinking beer and doing long races like a marathon :)

Anyway, during the discussion of what to cook for his farewell, he mentioned the famous Bang Bang Shrimps, and the blog. I was like WTF are the Bang Bang but after tasting them, I can say that I agree with Justin (or whoever he is) that they are as good as sex. I even did it for Christmas and they were a unique success.

So, Zack showed us (the A team of running that includes Noemi and Dominika - two ladies also eager to take most of life and who also did the Amsterdam Marathon with me) the blog and encourage us to participate…  and I thought about my Classic Garlic Bruschetta.

I love this appetizer since the Garlic can be stored in a jar in the fridge and use it to welcome guests anytime. And the combination of flavours gives a lot with such a little effort. I took this recipe from a magazine and I’ve been cooking it for the last 3 years.
So here we go… hope you enjoy it.


Caramelised Garlic
Ingredients:
1)    1kg of garlic cloves peeled off like Mama Tommy’s logo (this is the only challenge of the recipe - see below (*1) )
2)    250 gr. of black sugar. (I reinforced black since it is not brown. This is the secret ingredient and I could not find it in Brussels so I was shipping it from Buenos Aires :))
3)    200 ml of balsamic
4)    200 ml of soy sauce
5)    Thyme - as much as you like
6)    Rosemary - as much as you like… again
7)    Olive oil - see quantity below

PS: I usually prepare less than 1kg of garlic since it could be too much but up to you

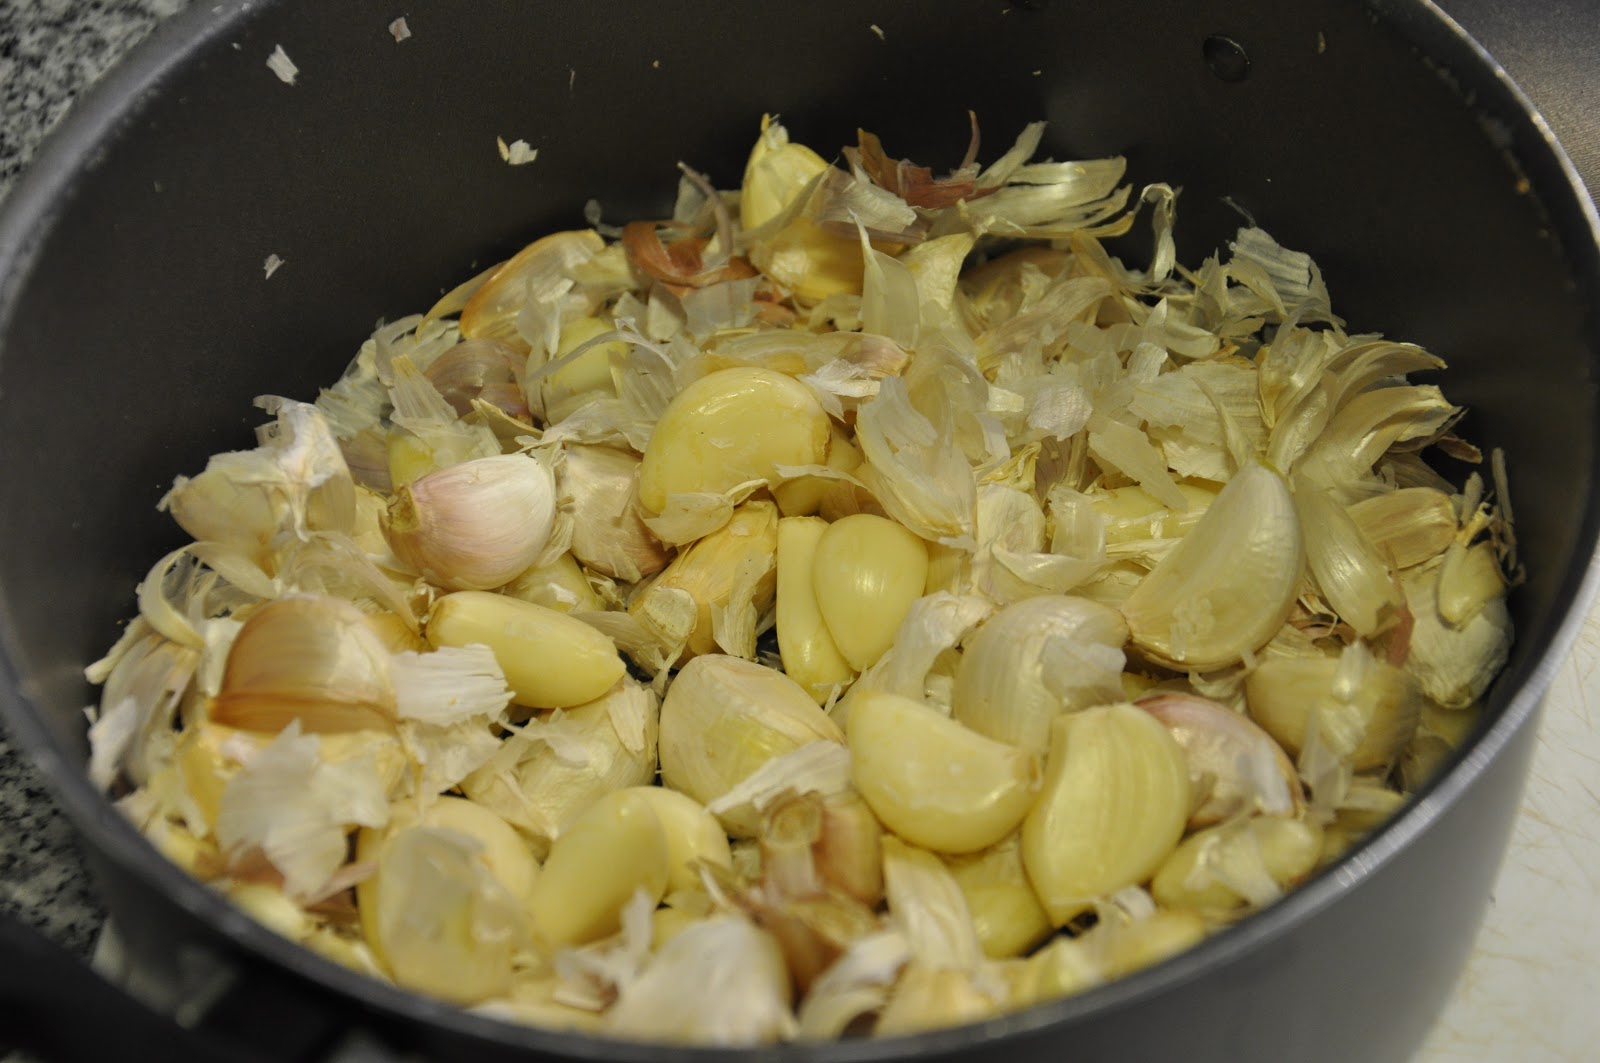
OK, hands on work. But referring to the challenge in (*1), your first question could be how in earth am I going to peel such a quantity of garlic?. First time I did it, I followed the traditional way of peeling the cloves one by one. It took me ages and it was not fun at all. But don't worry, there are solutions for everything. Thanks to sharing this recipe with other friends, one of them found an interesting technique of peeling them in seconds. Yes, it is not a typo, it is seconds. Even my Mom (an experienced cooker) did not believe me, but it amazingly works and adds some fun to the cooking and a lot of noise !! Be careful with your neighbors.

In a nutshell, you just need to put the garlic into two metal bowls and shake them hard. No, Justin, I am not taking about Bang Bang Shrimps or sex :)
Here you have a photo of my own peeling and a youtube video in case you are as skeptic as my mom.


And now? The easy part.
Once the noisy experience is completed, just put the peeled garlic in a pot with the rest of the ingredients and cook them at a low fire. Olive oil is just to make sure you cover the surface of the garlic. Thyme and Rosemary at your own taste. I use a lot since it does not harm.

Approximate time of cooking is 30 minutes.


Cook them until the garlic is tender (see pic). Let them cool down and save them in jars in the fridge as shown below.


Bruschettas
Ingredients:
1)    Bread for bruschetta (we call it country bread in Argentina but I think Cottage Loaf is the same)
2)    Roquefort cheese
3)    Rucola
4)    One clove of uncooked garlic (not the same one as above)
5)    Olive Oil
6)    And the Caramelised Garlic, of course :)

First thing is to slice the bread, use the uncooked garlic to scrape it in the bread and pour a little bit of olive oil on it as well. Then cook it in a very hot oven to make them crispy.


While waiting the bread, start cutting the cheese in cubes. Do the same with the caramelised garlic. Wash and cut some rucola.

Once the bread is ready, add the rucola, the cheese and the caramelised garlic (in this order) as you can see below. Spread some of the liquid in the jar on top for more sweet flavour and Voilá!


Ps: Ok, not my best pic here I must admit. It is the second round. I was so excited serving this during Christmas that I forgot to make the official picture of the first round that was looking much better :)

Enjoy it and thanks to Zach for encouraging me to take pics while cooking and write this down. It was a lot of fun!

Suggested soundtrack: Blackbird Album - Fat Freddy’s Drop

Tuesday, January 27, 2015

Israeli Vegetarian Lentil Soup [Zack]

Winter is raging outside and I wanted something to comfort my insides.  I chose to cook one of my favorite soups from an awesome little restaurant named Beni Falafel in the Jewish quarter of Antwerp.  They are known for making great falafel sandwiches, but I also really enjoy their lentil soup which is healthy, vegetarian, and kosher.

My version is very close to the original - I used lots of lentils, potatoes, red pepper, spinach, onion, garlic, and whole cumin seeds.  You'll feel like a super hero when you're finished eating - it's filling but doesn't feel heavy. 


Process:

Slice and dice all of your veggies.  

In a pot over medium heat, add 2T of olive oil and your onion, red pepper, and diced mushrooms.  Saute for about 5 minutes, then add the garlic and cumin seeds.  Cook for another 1-2 minutes until fragrant.  Dump in the potatoes, tomato, and your veggie stock.  

Add 3 handfuls of lentils to the pot (check for stones first) and bring to a simmer.  Lower the heat to low and place the lid on top a bit askew.  Cook the lentils for about 30-45 minutes depending on your texture preference.  

Add the spinach during the last 3 minutes of cooking and serve hot.  A small squeeze of sriracha can add some heat and a bit of sweetness to the soup.

You'll warm away any winter blues!

Ingredients:
1 medium red onion, sliced
1 red pepper, diced
6 baby bella mushrooms, diced
2 cloves garlic, minced
1T whole cumin seeds
1 tomato, diced
8 golf ball-sized baby red potatoes, diced
3 handfuls of green lentils
1 quart (1 liter) veggie stock
1-2 big handfuls of spinach
salt and pepper to taste
squeeze of sriracha if desired

Song: D'Angelo - Betray My Heart

Tuesday, November 11, 2014

Stracotto (Italian Pot Roast) over Pappardelle. (June)

It evens gets cold in Florida and when the temperature dropped the other day, I was thinking of "comfort food".  One of our favorite restaurants, Brio Tuscan Grill, had sent an e-mail with this recipe and it sounded perfect for a chilly Sunday dinner.

Ingredients

3 tbsp Olive Oil
2 Lbs Chuck Roast
1 Cup Chopped Onion
1 Cup Chopped Celery
1 Cup Chopped Carrots
4 Cloves Garlic, Sliced
1 Cup Beef Broth
1 Can (16 oz) Tomatoes, Diced
3 tbsp Tomato Paste
1 tsp Chopped Garlic
1 tsp Pepper
1/2 tsp Salt
1/2 tsp Dried Thyme
1 Bay Leaf
1/2 Cup Red Wine
1/4 Cup Chopped Parsley
1 Lb Pappardelle (recipe below for homemade or use store bought)

Heat oil in a Dutch oven.  Add chuck roast, sear on all sides, remove & set aside.


Add onions, celery, carrots & slivered garlic to the pot.  Cook until soft - about 10 minutes.  Remove from pot and set aside.


Place rack in bottom of the pot. (I didn't have one so I used a small, disposable aluminum pan)  Place roast on rack & add beef broth. Bring to a boil, reduce heat and simmer for 1 hour.

Preheat oven to 350.  Remove roast and cut into 1/2" slices.  Remove rack and return sliced meat to the pot.  Add tomatoes, tomato paste, chopped garlic, pepper, salt, thyme, bay leaf, red wine and cooked vegetables to pot. 


Bake covered for 1 1/2 hours or until meat is falling apart. Discard bay leaf.  Add parsley, heat through.  Cook pappardelle according to recipe or package directions.  Serve the meat and sauce over the pappardelle.


Homemade Pappardelle
 
1 3/4 Cups All-purpose Flour
1 Cup Semolina Flour
6 Large Eggs
4 tsps Extra Virgin Olive Oil
 
Sift both flours together on a large work surface & make a well in the center.  Place the eggs, olive oil and a pinch of salt in a bowl and break up with a fork.  Gradually add the wet ingredients into the flour mixture and mix just until combined. Using your hands works best!


Knead the dough until smooth and elastic.  Divide dough in half and pat into balls, wrap in plastic and refrigerate for at least 30 minutes or overnight.  (you can freeze one ball for later, or roll both and freeze cut pasta)


Place one ball of dough on lightly floured surface and dust with flour and roll dough into a sheet.  Continue to roll the dough until you can see your fingers through it.  We used our pasta maker to roll out ours.  Let dry about 10 minutes.
 
Dust the top of the sheet with flour and loosely roll into a cylinder.  Using a sharp knife, cut into 3/4 inch wide slices.  Unroll, dust with semolina and lay on a sheet pan until ready to cook. 
 
Not the perfect, even length pasta you might buy, but it was more fun to make it!


Confession!  We didn't get ours thin enough and it took forever to cook.